Showing posts with label Hels. Show all posts

Thursday, 5 September 2013

Sweet Life - DT Project by Hels

Gooodly Morning Snazzyfans... as promised I am back again with my second offering using the fabby 7Dots Studio 9th Wave Collection papers designed by the wonderful Finnabair and the Hero Arts Stencils we have been playing with this month.  The base for my project is a firm papier mache 3d board which is perfect for taking lots of layers of the gorgeous papers in the collection.


I started by covering the whole base with a darker patterned side of the paper and lightly sanding around the edges to get rid of any snarly bits (I am a bit rubbish with a craft knife... and if you too are a bit rubbish with a craft knife, sanding the edges makes the papers fit nice and flush)  Next I cut some more papers to layer over in graduating sizes, with the smallest bit making a border across the board.  I used the Stencil and Tumbled Glass Distress Ink to add some dots in two sizes and then sanded off all the edges of the layers of paper so they had a nice shabby finish that matched the base piece too.


I used some dies to cut a tab, in which I added a Rub On and then added a tag cut from the papers and again, sanded on the edges and some tattered lace to the border over the middle.  Tearing the tops of the layers was a bit of a doodah accident.... I hadn't meant to be quite so rough with my edge distresser and went a bit bonkers and off came the corner of the middle piece... so I improvised, tore the corner of the top piece and then stapled them together... aha, a cunning plan to avoid it looking like I made a booboo!  


I made a 3d rose using diecuts... and added Iced Spruce DI and the large dotty bit of the stencil to add a bit of variation on the flower and also cut a banner and some leaves which I coloured with Forest Moss DI... again, sanding all the edges so they matched.  Finishing touches were black paint around the edges of the base board, an acetate butterfly and a sweet little birdy and some pearl pins.


As ever, there's a "random commenter prize" up for grabs this month so please do pop over HERE to Gillian's first post where you can join in and have a chance at winning a cool prize.  Thanks for looking.. have a great day!  TTFN


Monday, 2 September 2013

Love Bird - DT Project By Hels

Gooodly Morning Snazzyfans and a very happy Monday to you all!  Blimey, we are already in September, I don't know where the time is flashing past to!  This month we lucky DT girlies have been playing with the most delish papers from 7Dots Studio, designed by the uber awesomely talented Finnabair.  The paper collection is called 9th Wave and, as ever with Finn's designs, it is beautifully coloured and the textured backgrounds are a delight to work with.  Coupled with a fabby Hero Arts Stamp Set and matching Stencil, I have created an altered photo frame for my first piece this month. 


I am a self confessed donut and forgot to get a piccie of the frame before alterations took place... I shall politely describe it as cheapo plastic covered faux wood circa 1970's stylee... but with a little bit of TLC, I transformed it into something much more glam.  Here's the paper insert I created.... and how I made it:


Starting with a piece of 6 x 8" paper from the 9th Wave Collection, I tore up a couple of strips of paper that are more purpley/pink in hue and used those colours for the base of my composition.  I used Dusty Concord and Black Soot Distress Ink to add some stencilling in the form of little dots to the edge of the paper, nudging the stencil so I have a nice subtle shadow going on.  Next up I used Ultramarine Archival Ink to stamp the torn paper image over the dotty inked bits and zapped this with a heat tool to dry the ink.  I added some larger stencilled dots by spritzing White Linen Dylusions through the Hero Arts stencil and then did a little bit more stamping, firstly using Plum Archival for the heart - stamping this twice to over lap the hearts and then with some Jet Black Archival to add a few solid lines and a couple of dotty lines.  The background papers are so gorgeous that you don't need to add anything extra to them but I do like the subtlety that the stencilling has introduced.


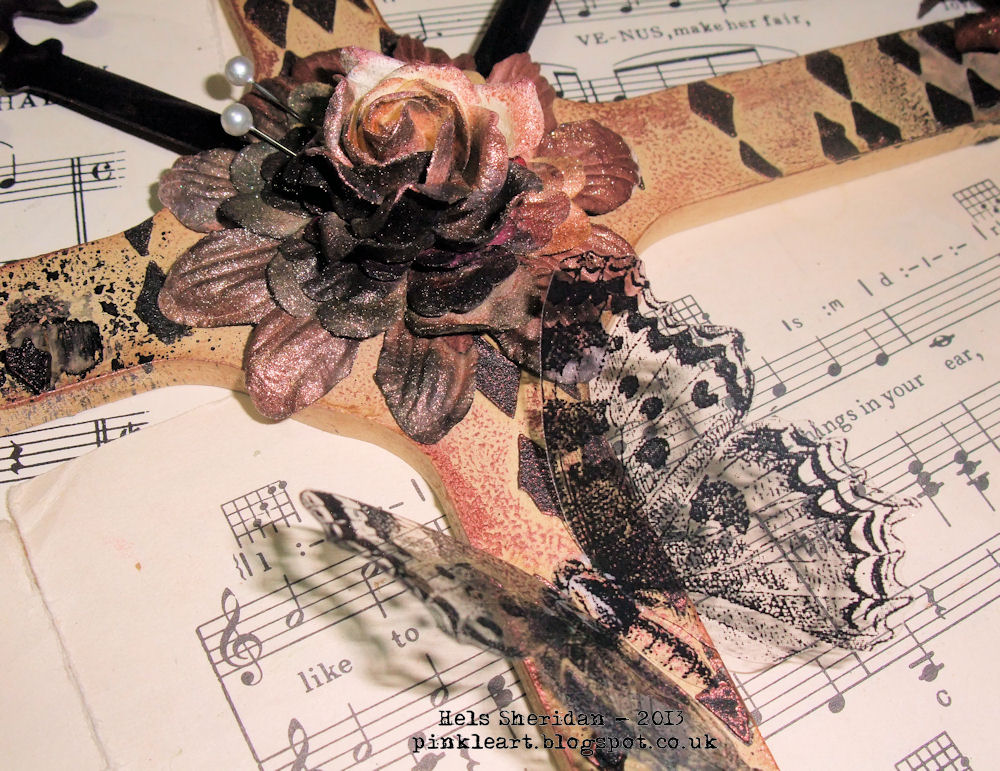
Next I set about adding some colour to paper flowers, using Crushed Grape and Black Marble Dylusions and some spritzes of Antique Rose Cosmic Shimmer to add some blingyness to the flowers.  These were then layered up with some metal Mechanical's embellies and some other bits and bobs from my stash.  The word was added using Alphaparts.  The frame was rather sad looking so I applied White Fire, Pewter and Royal Amethyst Treasure Gold to it using a brush... I love the way the metallic colours have blended together to give just a hint of purple on the frame.


As ever, the generous folks at Snazzy's are doing their random-commenter prize again this month.  Do CLICK HERE to see Gillian's first post and the deets how to partake... and also, please do scroll back through the months' posts to see all the delish designs the other DT girlies have made... they are all amazing as ever.  I will be back later in the week with my next offering... these papers are just soooo lush, I have hardly any left... oooh, any excuse to buy more stash right?  Speaking of which, don't forget that Snazzy's has a website... CLICK HERE for the shop!   Thanks for looking, have a fabby day!  TTFN


Monday, 29 July 2013

Just Hanging Around... By Hels

Gooodly Morning Snazzyfans and a very happy Monday to you all!  This month we DT have been happily playing with the brand new stamps from the pen of Jo Firth Young... check out the stamps HERE on the Snazzy website.  Also, please do scroll back to see all the delish pieces the rest of the DT have been making using these cute designs.  The stamps I chose to play with are JOFY13, JM20 and JM21


I made a 4 square hanging... I started out with a cat food box (AlfieCat is very accommodating when it comes to scoffing the contents!) and cut four 2 1/2" pieces of cardboard and then peeled back the top layer of the pieces, revealing some of the corrugations.  Next I used Cut & Dry foam to apply Nougat Fresco Finish Paint to get a nice even coverage on the cardboard.  I stamped the images using Jet Black Archival Ink onto tissue paper and then popped them onto the card squares, as shown, using Glue & Seal to adhere them.


I re-stamped the images onto cardstock, cut the main bits out and painted them in using Fresco Finish Paints... I used Claret for the Fuchsia's, London Bus for the Daisy, South Pacific and Smoked Paprika for the birdy and the greenery is all Hey Pesto.  The beauty of these paints in particular is that they are all translucent so perfect for painting over stamped images without obscuring the images themselves.  I added Little Black Dress around the edges of the squares and then smudged Treasure Gold to add some bling.  Finally, they were mounted onto black mountboard and I added the word using Alphaparts.


That's all for me for now... don't forget to CLICK HERE to see Gillian's first post of the month where there's a goody giveaway up for grabs!  Thanks for looking.... TTFN!


Monday, 24 June 2013

Knock On Wood - DT Project by Hels

Gooodly Morning Snazzyfans and a very happy Monday to you all!  This month us teamies have been playing with the superb new Base Coat Collection from KaiserCraft, plus some new gorgeous clear stamps from them too.  To see the rest of the team's gorgeous creations, please do scroll back through the past months posts... from scrapbook pages to mini books, the ladies have made some glorious eyecandy to drool over.  As ever, the generous guys at Snazzy's are offering a prize to a "random comment" left on THIS POST by Gillian, right back at the beginning of our DT month.  Tis simples to join in... just leave a comment for Gillian and the winner will be chosen at random and announced next Monday.  And, as ever, to see a plethora of loveliness, CLICK HERE for the Snazzy online store.


On with my offering... so, I am really into the colour brown, that is no secret... so when I first had a look through the papers, the first thing that leapt at me was that whilst there is brown in the papers, it was the amount of different shades of brown... cue gasps and oooh-ahhh's.  Not only are the papers lush, they are also double sided... and yep, the other side of the papers are equally as lush and also have different colours to them... nothing bright and smack you in the face colourful, instead, they are muted and delicious and ever so shabby.   So, as ever, whenever I get my mits on a d/s sheet of paper, I have to make a rose... it would be rude not to!  There is a step-by-step tut over on my blog HERE where I show exactly how to make this type of rose if you fancy a nosey.  I started out with a piece of mountboard which I painted with black Gesso and then cut a piece of corrugated card (catfood box) and used the Gesso on this too but left some of the card bits showing to keep the colours tied in.


Next I cut some of the papers to fit, the bottom layer was cut twice, adding the top layer on and then tearing the second of the two same size pieces so it looks like the top layer is being revealed (cool cheats way btw)  I used a paper distresser and Walnut Stain Distress Ink to shabby up the edges of the papers.  On the torn piece, I used the Botanical clear stamp with Jet Black Archival to add the floral collage, stamping this again three times onto a different paper and then cutting out the butterflies to use as embellies.  The Secret Admirer words were also stamped onto the torn paper bit using the same ink.  I cut a small strip of cardboard and painted this with the Gesso too and layered this over the paper collage.


Next I began assembling the piece, using Treasure Gold to add some gilding to the base and cardboard... adding in a few faux screw brads so it added to the "wood" effect of the papers... and then finally assembling my rose with some twiggy bits behind for added texture.


That is all from me for now... Have a great week and thanks for looking... TTFN!


Monday, 20 May 2013

It's A Wrap - DT Project by Hels

Goooodly Morning Snazzyfans and a very happy Monday to you all.  This month us teamies have been playing with the Gallerie Wrap canvas making kit.  To say I was a smidgey bit dreading making my canvas is an understatement... for you see, I am useless with a ruler and measuring is not my strong point.  However, I am happy to report that putting together my canvas was easy-peasy!  There is a video on YouTube that does a step by step, so I watched a bit of that (ok, so I watched it all) and then set about constructing my creation.  I set off by using Distress Paints to colour the canvas sheet.


The colours I used are Antique Linen, Broken China, Salty Ocean and a smidge of Seedless Preserves.  The base of the canvas sheet was coloured using the first two colours, mixing them together on the canvas using water and Cut & Dry foam.  Once I had dried this layer, I set about making some cool drippage down the canvas sheet, starting with a paintbrush full of Salty Ocean and spritzing it with water.  Once dried, I used Seedless Preserves in the same way... and finally, once that was dry, I lightened it slightly with the Antique Linen. Whilst the canvas was off the frame, I used a Prima stencil from my stash (although Snazzy's do have some delish ones too...) and a mix of Studio 490 Embossing Paste and Puff Paint, levelling the paste on to start with and then using my spatula to add peaks and whirls to the stencilled paste... this means it has a nice bumpy top for added texture.  The above pic is of the stencilled Hollyhocks with added smidges of gilding wax... and this photo is after I added some shading using a Stabilo All pencil... I love the way that the black is softened but makes the image pop a bit more.


Once this was all set and done, I used Jet Black Archival Ink to add some stamping... I used the gorgeous dotty stamp from Finnabair range for Prima - also available at Snazzy's HERE. Always remember to heat set Archival ink as it is oil based and likes to feel the heat... plus, you don't want any smudgey accidents.


Next I set about constructing my canvas.  Following the step by step instructions on the video, adding the glue with the kit and then hammering (I do love an excuse to hammer!) the little pins in to hold it together, my canvas was ready!  It was that easy!  Hurrah!   Anyways, I had a bit of a mess goin on on the edges - basically, all the drippage looked a bit ugly, so I popped some Black Gesso onto my craft sheet and pounced Cut & Dry into it, then onto the edges of the canvas, bringing a bit of the gesso onto the front edges to give the canvas a frame.


Of course, no self respecting canvas of mine is replete without the addition of paper flowers... these started life as plain old cream ones - I just used Sail Boat Blue Colorwash and Seedless Preserves Distress Stain to colour them... adding ickle papre roses to the centres and then spritzing them with a bit of Black Marble Dylusions sprays and Egyptian Blue Cosmic Shimmer for added bling.  I added on some of the gorgeous metal embellies from Finnabair's Sunrise Sunset range for Prima... and a few Alpha Part letters to make the sentiment... and voila, one canvas.  To be honest, I am really chuffed that I made this right from scratch... kind of makes it a bit more special, if you know what I mean :O))


Please do scroll  on down to see the utterly AWESOME creations for the rest of the teamies... and also click HERE to go to the right post to be in with a chance of winning a prize this month.  As ever, thanks for looking.... TTFN!


Monday, 15 April 2013

Lucky Number...By Hels

Goodly Afternoon SnazzyFans!  Here's my DT offering for this month, using the fabby new Sunrise Sunset goodies from the talented Ania Dabrowska for Prima.  The collection is very wide and incredibly well thought out with lots of gorgeous embellies to go with the beautiful papers, not to mention the cool stamps too!  I have combined some of the papers with some of the embellies and made this tag:


It is a Ranger Size 10 tag, I cut the bottom 21/2" off to make a piece for hinging and then added three layers of the papers, edging these with Walnut Stain Distress Ink to make them nicely blended.


The flowers are just plain cream ones that I added some Dylusions sprays to to colour them... and once assembled, I gave them a zap with Black Marble Dylusions and Marigold Cosmic Shimmer spray.


The metal embellies were gilded with waxes to change their colours to match in with my colour theme and I also added a piece of the wooden scallop - I had snipped this down to size and coloured it with Black Soot Distress Stain.  A few eyelet and some thin twine to join the two sections together and voila, a cute little wall hanging tag.


That's all from me for now - don't forget to pop online to the Snazzy website where new products are being added regularly.  Thanks for looking... TTFN


Wednesday, 13 March 2013

Find Delight - DT Project by Hels

Gooodly Morning Snazzyfans!  I am back again with another taggy offering using the gorgeous Prima Engraver Collection that we DT girlies have been using this past month.  Before I waffle on, please do remember that Snazzy's very kindly offer a discount on the DT Kit that we are using... so  you can grab yourself the same kit we have used... and get a bargain into... erm... the bargain!  HERE are all the deets how to snaffle one for yourself :O))


Another tag from me, this time a smaller one.  This is a normal size 8 manila tag from Ranger.  I used Distress Inks to colour the tag:  starting with Antique Linen, I blended over the entire tag and then added Frayed Burlap DI around the edges.  Around the very edgy bits I added Brushed Corduroy DI - this colour tones perfectly with the Engraver collection.  Next I did a bit of stamping for the background using the Engraver stamps and Ochre Archival Ink.  I added a smidge more interest using a clock stencil and Frayed Burlap DI.


Next I used some of the offcuts of paper from my previous project and made a little banner piece... adding stickyback metallic pearls for a bit of bling and then sticking it directly to the tag base.  I had a Grungepaper diecut hinge kicking about on my desk, so I coloured that with Brushed Corduroy and Walnut Stain DI and popped that onto the bottom of the tag.  The flowers in the kit are to die for so I had to use those aswell... spritzing them with Black Marble Dylusions and Cosmic Shimmer Ancient Copper to add a bit of sparkle.   The sentiment was made up using Idea-ology Chit Chat Stickers and popped onto 3d foam to make the sentiment pop a little more.  In the kit are some little pearly swirls so I stuck those on after adding a smidge of gilding wax to them to tone them in... how pretty!


Anyways, that's all from me for now... don't forget you could be in with a chance of winning the fabby DT Kit that we have been using too... simply leave a comment on this post HERE.   Thanks for looking... TTFN!


Monday, 11 March 2013

Memories - DT Project by Hels

Goodly Morning Snazzyfans and a very happy Monday to you all!  If you have been following the blog this past month you will have seen some gorgeous creations from my teamies using the fabby Prima Engraver Collection of papers, stamps and flowers.  CLICK HERE to see the collection we have been working with and also... remember you can grab yourself a goodly bargain because our DT kit is for sale at a bargain price too :O))  


My first offering this month is a mahoosive Size 12 tag from Ranger.  The tag base is manila in colour and to make it match with the colour theme of the Engraver papers, I used Vintage Photo and Walnut Stain DI's to blend around the edges.   I cut the tag into two pieces so I could then attach it back together with eyelets and a bit of hemp.  I cut some of the papers (they are so gorgeous... almost too difficult to cut them lol) to fit onto the tag in layers... making a focal point on the bottom half of the tag with the clockface.  I added a Tim Holtz Fragment to the centre of the clock to make it pop more.


The cut papers were all edged with Walnut Stain DI and I scruffed up the edges to make it a little more shabby looking.  I added a couple of pieces of the ruler papers so the top bit of the tag as an arty addition.


The sentiment was stamped onto an offcut of paper using Jet Black Archival Ink and then edged with Vintage Photo to make it blend in nicely.   One of the papers has some fabby circle designs on it... and it just so happened that I had three more Fragments that fitted over the circles perfectly... so they were glued on with Glossy Accents and when cut out, edged with more Vintage Photo just so there weren't any white cut bits showing.


The embellishing was fun indeedily... the flowers in the Engraver collection are stunning... the larger ones have a broken glass style of glitter attached to the petals, once I had given them a good spritz with Black Marble Dylusions and Ancient Copper Cosmic Shimmer they really came to life.


The butterflies are also from the stamp set... stamped onto the papers again, using Black Archival and Walnut Stain DI to edge them around to make them match in... and I added some metal spinners to the middles for bodies.

Don't forget that you can still win this fabby collection - just CLICK HERE for the details... easy peasy!   Please do scroll back to see the other beautiful creations that the team have made with this fabby collection...


Thanks for looking... have a fabby day!


Friday, 8 February 2013

DT Project - Art Life - By Hels

Goooodly Morning Snazzyfans!  Apologies for the late start, Mr Internet decided to take a long break last night so I couldn't post at the usual time!  Anyways, better late than never I always say so here we are with the last DT post using the MDF Man's Cogs that we have all been working with this past month.  Speaking of which - if you scroll back through all the recent posts, you can see the adorable art that the other girlies on the team have created.  Also, if you click HERE you will be magically transported to the Snazzy's online store... and... if you click HERE you will be whizzed away to the first post of the month where you can leave a comment and be in with a chance of a spot prize! 


So, a few days ago you saw the faux clock I made... and being as I lurves my flowers, I decided to go down the same route with this creation, only this time I used all Studio 490 flowers and leaves - did you know Snazzy's has an amazing collection of Studio 490No?  Click HERE to see it all in its glory!   I started out by painting the base cogs with Mushroom paint, I applied it all over with a brush and then once dried, I used the same brush (now quite dry) to add a bit of texture with sweeping strokes across the cogs.


Next I applied Vintage Photo DI around the edges of the cogs - because the Mushroom paint is acrylic, it has a bit of a chalkiness to it... which meant the Distress Ink was lovely and muted, just the ticket!   Next I used some Studio 490 Stencils for Art and applied Tumbled Glass DI over the diamond pattern... a quick zap with a heat tool to set the ink and then applied Iced Spruce DI over the long liney pattern stencil, ensuring I didn't cover the entire cog face.  Once these had been dried off, I used Cosmic Shimmer Glue to stick the Cogs together so when this piece was finished it became a wall hanging.


Now to the happy place of stamping out some Studio 490 flowers and leaves onto pretty patterned papers.  I could have used Grungepaper but I wanted to keep the light pretty feel of the piece so double sided papers were perfect.   Once stamped, in Coffee Archival for the flowers and Olive Archival for the leaves, I cut them all out.  Next came the tidying up bit, were I edged all the flowers with Tumbled Glass DI - this gets rid of any nasty white cut bits... and Forest Moss DI for the leaves.


Finally, I assembled them onto the cogs and added some butterflies and my fave bits... Embellish Your Art, the ickle resin delights from the Studio 490 range.  The letters making the words are Idea-ology Alpha Parts that I jazzed up a bit with some gilding wax.    And there you have it.  A pretty was to use a quite masculine object.   Do pop back on Monday BTW because Gillian will be here with the brand new DT kit we are playing with next month... ohhhlalalaaa.. are you in for a treat!   Thanks for looking... have a great day!  TTFN


Monday, 4 February 2013

DT Project... Take Time For The Flowers...by Hels

Gooooodly Morning Snazzyfans and a very happy February to you all! I can't believe the last time I was here it was Christmas Eve! Where did January go huh?  Anyways, I am here today with my main project using the fabby DT kit that we have been all playing with this month ... the fabulous cogs from the MDF Man.  I have had a ball playing with this very large cog - it is about 30cm across so you can get an idea that it's a cool size to alter.  Please do take time to have a browse on the Snazzy website, more and more delish products are being added regularly :O))


I started by colouring the MDF with cream paint ... applying with Cut & Dry foam in a pouncy motion, I find this is a good way to cover most surfaces and you don't waste a load of paint on a brush either.  Once the paint had dried, I used a Dylusions Stencil and some Embossing Paste to add diamonds to the cog.  This was dry within about 30mins so I got cracking with the flowers whilst I was waiting... adding layers of paper flowers together, some were plain white so I used Dylusions Sprays to alter the colour of them and dried them on my little wall radiator (don't ask what colour it has become lol)  A quick mist of Cosmic Shimmer spray made a little blingy sparkle for the flowers.


I used some Clearly For Art (Black) and diecut some hinges... cut them to size and used these as hands for my clock.  I added a couple of eyelets to just make the hands look a bit fancier... and then smidged on some gilding wax to sparkle them a bit.  I also added a smidge of gilding wax to the clock too... and then coated the whole surface with Multi Medium... once dried, I used Black Marble Dylusions Sprays to add some black splots to the piece.  Finally, I cut out some acetate butterflies that have lived in my stash for about 731 years... sticking them with the ever useful Cosmic Shimmer Glue. 


Please do scroll back through the DT posts this past few weeks... the girls have made some fabulous creations with the MDF Man's stuff.... oh and also CLICK HERE to leave a comment to be in with a chance of a random prize.  The winner will be announced next week :O)  Thanks for looking... TTFN!


Friday, 23 November 2012

The Rosey Tag of Christmas

Gooooodly Morning Snazzyfans... cor blimey, my internet is soooo slow, I have just spent a yonk and a half trying to get my page to load.. finally!  Well, I shall be a smidge later posting this than anticipated but better late than never!  So, I am back again with another offering that I made using the (saying this loudly) Teresa Collins Christmas Cottage Collection papers that we DT have been lucky enough to be playing with this week.  How can I describe the papers?  Do you remember the old Crate Papers of years ago? Textured so they have a linen-y/canvassy feel to them? Well, these are just like that, very reminiscent of them. The designs are marvellous - not too old fashioned but with enough of a vintage feel that they aren't ultra modern and in-your-face (I don't do ultra modern lol) The quality is amazing; they are a very strong paper, more like a cardstock in actual fact.  The Collection comes with a sheet of die-cuts too, one of them I have used on this tag - and they all match perfectly with the double sided designs.  And... did you know... you can CLICK HERE to be transported off to the Snazzy Online Store where lovely Val and Don have put a discounted special offer on our DT kits for this month.  As well as the papers we have had some stamps to use (I haven't inked mine yet!) and... some goooorgeous brads to match too (I loves my brads!)  Anyways, enough waffle, on with the tag:


The tag is a Size 8 cut from plain cardstock and then covered with two of the patterned papers.  I made a little border thingy to cover up the join in the papers and added a brad from the pack - check it out... not only is it big (bout the size of a 5p) it is also designed and has an epoxy covering so it is glossy and raised!  Cool huh! Once I had done this, I edged all around the tag with Frayed Burlap Distress Ink and then took my paper distresser and scuffed up the edges to make it a little shabbier. 


Next came some bling in the form of a very light wafting of Rock Candy Dry Stickles - I used Glue & Seal to paint onto the top and bottom of the tag and then sprinkled liberally with the Dry Stickles... I LOVE this stuff.. it is like crushed sugar, not a smidge of AB anywhere so the light just sparkles instead of colouring.  You can see the bling in one of the photo's.   I did a wee bit of die-cutting with the papers - you can see how strong they are, they withstood a Vagabond-ing and then a sanding too!  I added Rock Candy Dry Stickles to the number 25 - again using Glue & Seal for the sticky bit.


After all that die-cutting I got all creative (!) and made myself a rose.  I love making these big fancy roses - they are soooo simples too - if you check out my own bloggy there's a link in the side bar to a Tut I did some time ago... a simple way to make pretty roses.   I added some wire twists and a couple of Alcohol Inked bells to the rose embellishment and then finally, one of the pop-outs from the die-cut page of the collection, edged with Frayed Burlap and distressed with the paper distresser and then popped into a Memo Pin.  I added a few bits of Idea-ology to the top of the tag with some ribbon and voila, finished!


If you haven't already... CHECK THIS OUT... you can leave a comment and be in with a chance of winning some fabby candy... all you need to do is leave a comment!    That's all from me for now... thanks for looking... have a great day!  TTFN