Goooodly Morning Snazzyfans! Apologies for the late start, Mr Internet decided to take a long break last night so I couldn't post at the usual time! Anyways, better late than never I always say so here we are with the last DT post using the MDF Man's Cogs that we have all been working with this past month. Speaking of which - if you scroll back through all the recent posts, you can see the adorable art that the other girlies on the team have created. Also, if you click HERE you will be magically transported to the Snazzy's online store... and... if you click HERE you will be whizzed away to the first post of the month where you can leave a comment and be in with a chance of a spot prize!
So, a few days ago you saw the faux clock I made... and being as I lurves my flowers, I decided to go down the same route with this creation, only this time I used all Studio 490 flowers and leaves - did you know Snazzy's has an amazing collection of Studio 490? No? Click HERE to see it all in its glory! I started out by painting the base cogs with Mushroom paint, I applied it all over with a brush and then once dried, I used the same brush (now quite dry) to add a bit of texture with sweeping strokes across the cogs.
Next I applied Vintage Photo DI around the edges of the cogs - because the Mushroom paint is acrylic, it has a bit of a chalkiness to it... which meant the Distress Ink was lovely and muted, just the ticket! Next I used some Studio 490 Stencils for Art and applied Tumbled Glass DI over the diamond pattern... a quick zap with a heat tool to set the ink and then applied Iced Spruce DI over the long liney pattern stencil, ensuring I didn't cover the entire cog face. Once these had been dried off, I used Cosmic Shimmer Glue to stick the Cogs together so when this piece was finished it became a wall hanging.
Now to the happy place of stamping out some Studio 490 flowers and leaves onto pretty patterned papers. I could have used Grungepaper but I wanted to keep the light pretty feel of the piece so double sided papers were perfect. Once stamped, in Coffee Archival for the flowers and Olive Archival for the leaves, I cut them all out. Next came the tidying up bit, were I edged all the flowers with Tumbled Glass DI - this gets rid of any nasty white cut bits... and Forest Moss DI for the leaves.
Finally, I assembled them onto the cogs and added some butterflies and my fave bits... Embellish Your Art, the ickle resin delights from the Studio 490 range. The letters making the words are Idea-ology Alpha Parts that I jazzed up a bit with some gilding wax. And there you have it. A pretty was to use a quite masculine object. Do pop back on Monday BTW because Gillian will be here with the brand new DT kit we are playing with next month... ohhhlalalaaa.. are you in for a treat! Thanks for looking... have a great day! TTFN
Showing posts with label MDF MAN. Show all posts
Friday, 8 February 2013
Monday, 4 February 2013
DT Project... Take Time For The Flowers...by Hels
Gooooodly Morning Snazzyfans and a very happy February to you all! I can't believe the last time I was here it was Christmas Eve! Where did January go huh? Anyways, I am here today with my main project using the fabby DT kit that we have been all playing with this month ... the fabulous cogs from the MDF Man. I have had a ball playing with this very large cog - it is about 30cm across so you can get an idea that it's a cool size to alter. Please do take time to have a browse on the Snazzy website, more and more delish products are being added regularly :O))
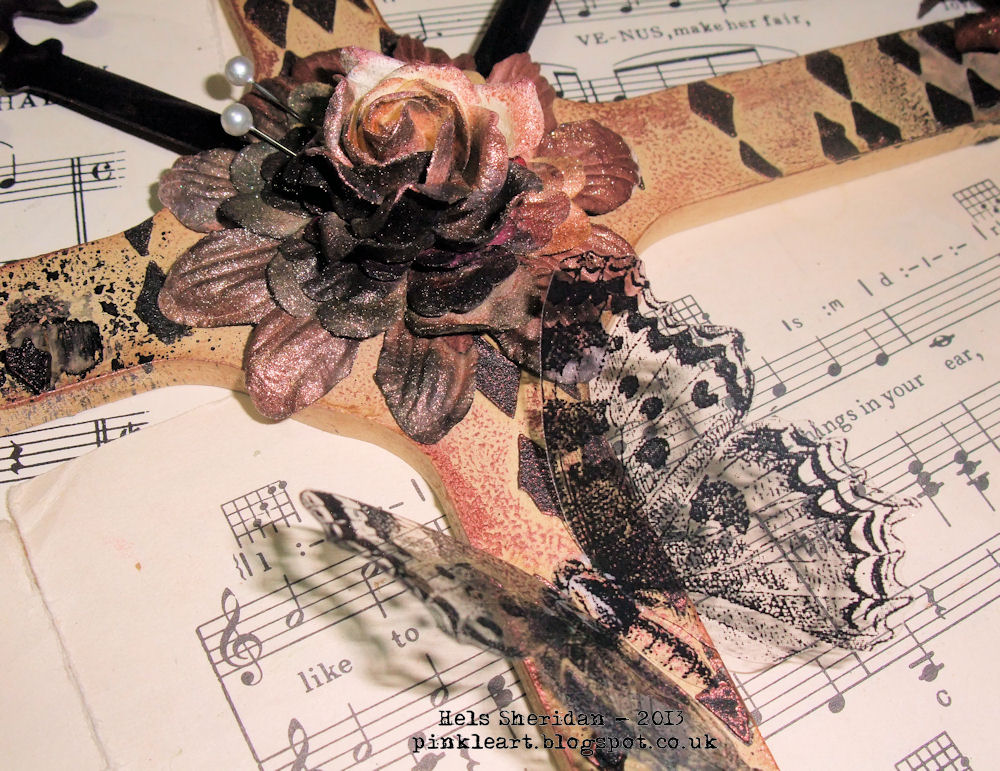
I started by colouring the MDF with cream paint ... applying with Cut & Dry foam in a pouncy motion, I find this is a good way to cover most surfaces and you don't waste a load of paint on a brush either. Once the paint had dried, I used a Dylusions Stencil and some Embossing Paste to add diamonds to the cog. This was dry within about 30mins so I got cracking with the flowers whilst I was waiting... adding layers of paper flowers together, some were plain white so I used Dylusions Sprays to alter the colour of them and dried them on my little wall radiator (don't ask what colour it has become lol) A quick mist of Cosmic Shimmer spray made a little blingy sparkle for the flowers.
I used some Clearly For Art (Black) and diecut some hinges... cut them to size and used these as hands for my clock. I added a couple of eyelets to just make the hands look a bit fancier... and then smidged on some gilding wax to sparkle them a bit. I also added a smidge of gilding wax to the clock too... and then coated the whole surface with Multi Medium... once dried, I used Black Marble Dylusions Sprays to add some black splots to the piece. Finally, I cut out some acetate butterflies that have lived in my stash for about 731 years... sticking them with the ever useful Cosmic Shimmer Glue.
Please do scroll back through the DT posts this past few weeks... the girls have made some fabulous creations with the MDF Man's stuff.... oh and also CLICK HERE to leave a comment to be in with a chance of a random prize. The winner will be announced next week :O) Thanks for looking... TTFN!
Monday, 7 January 2013
DT Project #1 .... It's All About The MDF Man!
Good morning everyone it's great to be back after our festive break .... the design team are raring to go again with this months kit (will certainly get the cogs ticking that's for sure).
This month the DT will be working with the following shapes courtsey of The MDF Man - so we have a free reign this month in terms of creativity. Look forward to seeing the design team members interpretation.
For me their was only one way to go with this .... out & out grunge (sorry folks if that is not your thing).
I started out by using Distress Ink (Antique Linen) on all the cogs, after adding a couple of layers I then inked the edges with Distress Ink (Walnut Stain). The largest of the cogs was then stamped using Tim Holtz/Stampers Anonymous Classics #6 in Archival Ink (Sepia). I then applied a second layer of stamping using the "text" stamp from Tim Holtz World Traveller Stamp Set, this time using Archival Ink (Jet Black).
The small cog at the top was stamped using the large background from Tim Holtz Remnants stamp Set.
I stamped the "face" image (from Tim Holtz/Stampers Anonymous Classics #5) onto cardstock and cut to size, the quote is from Tim Holtz World Traveller Stamp Set ....
.... which was cut up into small bits rather than keeping it as one long sentence.
This month the DT will be working with the following shapes courtsey of The MDF Man - so we have a free reign this month in terms of creativity. Look forward to seeing the design team members interpretation.
For me their was only one way to go with this .... out & out grunge (sorry folks if that is not your thing).

I started out by using Distress Ink (Antique Linen) on all the cogs, after adding a couple of layers I then inked the edges with Distress Ink (Walnut Stain). The largest of the cogs was then stamped using Tim Holtz/Stampers Anonymous Classics #6 in Archival Ink (Sepia). I then applied a second layer of stamping using the "text" stamp from Tim Holtz World Traveller Stamp Set, this time using Archival Ink (Jet Black).
The small cog at the top was stamped using the large background from Tim Holtz Remnants stamp Set.
.... which was cut up into small bits rather than keeping it as one long sentence.
I've used Tim Holtz Ideaology to decorate - Hitch Fasteners, Clock Face & Game Spinner which were coloured using Metallic Distress Stain (Antique Bronze), I've also used an Ideaology key.
I hope you have enjoyed this project, it sure was fun to do .... don't forget to leave a comment here to be in with a chance of winning the random comment prize drawn after Hels week.
TFL x
Subscribe to:
Posts (Atom)