Friday 30 March 2012

DT project 3 by Astrid

Hi all, today I am back with my final project for this month. The papers from the 7 Dots Studio "Wonderland Collection" are so versatile and offer so many different possibilities.


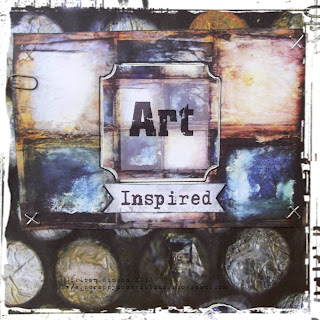
This is a card in soft muted tones. I die cut a fancy shaped card from Craft card and mounted a piece of the muted toned Quadrille paper on top. Before mounting it I played around with some gesso and stamps from my stash on the paper and I sponged a bit around the edges with  Weathered Wood and Antique Linen Distress Inks. I created a vocal image with some of the elements from the Chocolate Baroque "The Art of Chess" set stamped in Vintage Photo and coloured again with Antique Linen and Weather Wood.
I embellished with elements from the sticker sheet that comes with the collection, some lace  and one of my home made flowers.


Well, that's it for this month but be sure to be back next week when Gillian will start the new month off with some brilliant new project and marvelous products!!

Wednesday 28 March 2012

DT project 2 by Astrid

Hi everyone, am am back with my second project featuring 7 Dot Studio "Wonderland Collection" and Chocolate Baroque "The Art of Chess". For this project I used Mushroom and Smoke paper and the main image from the stamp set. Remember when you leave a comment under any of the projects this month you are in for a chance to win this set!!


Anyway, as you can see, for my second project I decided to make a sturdy box. My brother in law loves to play chess and I wanted to make him a box to keep his chess pieces safe. I started by making a box out of sturdy black card and covered it with the paper which I had first edged with a gold Krylon pen.


I then stamped the image twice, once on white card and once on a piece that I had previously painted with gold acrylic paint. I cut some of the elements out from this piece and glued them on to the bit stamped on white card. I sponged the edges a bit with Antique Linen Distress Ink to add a bit more depth and mounted it on a die cut frame of black card.


Here you can see the sides of the box embellished with some die cuts cut from gold mirri card.


Well, that's it for today. I will be back on Friday with my final project.

Monday 26 March 2012

DT Project 1 by Astrid:featuring

Good morning all!
As most of you will know by now, this month we are featuring:
7 Dots Studio "Wonderland Collection"
Chocolate Baroque "The Art of Chess" stamp set
and the best of all, for you our faithful readers is that there is still a little time left to leave a comment and be in for a chance to win this fabulous stamp set!!

On to my first project this month:
I decided to make a mini journal.

The journal has an accordion fold spine and blank pages inside.
My journal has a slightly odd size, 8" by 4 1/2, but I wanted it to be small enough to fit into a bag, yet have enough space for plenty of journaling, stamping and general art fun.
To make a journal like this you need 2 pieces of chip board for the covers, a piece of strong card 12 " wide and the height of your finished journal which will have 10 pages, enough card or water colour paper cut to the size of your journal covers for the 10 pages inside, and of course papers to decorate your covers. I used "Quadrille" and "Follow the Rabbit" from the Wonderland Collection.
Here's a brief description of how to make it:
1. Once you have cut all your papers, card and chipboard, start by scoring your card for the spine every 1" and fold accordion style.
2. Cut your chosen papers 1" larger than your covers on all sides. Put your cover in the center of the paper, score around it and then cut  and glue down as shown.

3. Now cover the inside of the cover with a slightly smaller piece of the papers.
 4. Do the same with the back cover.
5. Now it is time to attach your covers and papers to the accordion folds. You can use either two sided tape or the adhesive of your choice.
6. Cut another piece of the paper to the height of your covers and wide enough to go right around the spine. You can give it a decorative edge if you want. This will hold your album together. You can see it in the pictures above and  below

7. Now comes the best part: embellishing your covers.
I created a separate piece using more of the papers, which I gessoed slightly, misted  and played around on with stencils and stitching. I then used some elements from the Wonderland stickers, some of the stamps and bits and pieces from my stash to decorate it further . Before gluing it down, I adhered some ribbon underneath in order to close the journal and did the same on the back cover, gluing the ribbon under an embellishment.
front

back
inside pages ready to journal and decorate.

Well that's it for now, I will be back later in the week to show you another project.

Friday 23 March 2012

DT Project #3 by Minxy : Featuring:

7 Dot Studio 'Wonderland' Collection
Tim holtz Idea-ology stash
>><<
Hiya snazzy folks, I'm back with my last piece for this month.
I found a frame in a local charity shop that looked perfect for altering, so I removed the glass and replaced it with a backing of 'mad tea party' wonderland paper backed onto card.
 I gave the frame a coat of picket fence distress stain, when that was dry I also used some rusty hinge and mustard seed distress stain to reflect the colours in the paper.
I liked the doily on one of the wonderland circle die-cut elements, so I fussy cut it out, and paired it with a bit of real vintage doily I had.
 Then I pulled out all my Tim idea-ology stash and started playing to see what looked right.
 I ended up using some of the wings from the regal adornments set, which I slightly coloured with a bit of acrylic paint, A number from the Numerals set, which I coated with crackle accents and then coloured with acrylic paint. 1 of the mini light bulbs and a random key I had in my stash. I also highlighted the word create with more crackle accents.
I diecut several roses from more of the wonderland paper that I coated with a little rock candy stickles and  added then to the frame at opposite sides to balance it out, I then coloured some fibres and with a glue gun I stuck that and some classy glass beads along the inside of the frame for added interest and texture. And I finished by adding an idea-ology philosophy tag to a memo pin, hung with a mini paper clip.
And that concludes my projects for this month.
Don't forget one lucky person who leaves a comment before the end of the month will win a set of the 'Art of Chess' Stamps
The lovely Astrid will be here on Monday with more wonderful 'Wonderland' creations.
Till next time.
Stay Inky

Wednesday 21 March 2012

DT Project #2 by Minxy : Featuring:

7 Dot Studio Wonderland Collection 
Chocolate Baroque 'The Art of Chess' Stamps
>>><<<
Hi snazzy folks
Here I am back with my second project of the month.
This time I decided to do a scrapbook layout, The wonderland papers scream out to be used in this way so who am I to argue with it.

I started with a a sheet of 'royal garden' wonderland paper,  I then created a checker board with a stencil and black and white adirondack acrylic paint dabbers
Next I got some old playing cards and coated then with gesso and distressed the edges with a paper distresser.
Then I added the photo's to the centres of the king and queen cards, using the ace of hearts for the middle card. 

To carry on the wonderland theme I stamped the 2 largest sets of chess pieces onto kraft card in black archival and cut them out. I placed 2 by the king and 2 by the queen.

To finish I added some of the wonderland stickers and die-cuts, along with some mini playing cards that I also gesso'ed and distressed.
And edged everything with a pastel crayon in a similar colour to the background.


I hope today's layout has inspired you to get out your papers and play today, 
I'm back on friday with my final project of the month to delight your eyes lol
>><<
Till Then Stay Inky

Monday 19 March 2012

DT Project #1 by Minxy : Featuring

7DotStudios 'Wonderland' Collection Papers & Stickers 

Hiya Snazzy Folks
This month as you know we have had the wonderland papers to play with and boy oh boy are they lush, But with such lovely paper comes the thought that you have to cut it and maybe cover it up with other elements.. those paper treasurers out there will know what I mean. So I wanted to make something that showed as much of the pattern on the paper as possible. 
So I came up with this:
It's a old tin can, And a fairly simple project to do.

I cut my piece of 12x12 paper {mushroom & smoke} into 3 equal sections as the tin was 2 large for the sheet to just wrap around, plus it looked nicer.
I got out the sewing machine and zigzag stitched the 3 pieces together, overlapping each piece and making sure the piece would wrap around the tin with an overlap at the end.
Finishing the piece was a little tricky as I had to hand pierce with a poky tool & stitch the open sides after it was on the tin, which I did by loosely stitching and then pulling tight once it was in place.

Then to finish I added some of the wonderland stickers, and outlined them with complimentary colours of neoII pastels and rubbed in so they almost blend into the background.

And hay presto, You have a fun funky pot for your supplies to sit in.
I hope you have enjoyed my little project for today, I'll be back on wednesday with more wonderland fun.
Till then Stay Inky

Monday 12 March 2012

Design Team Project #1 featuring Chocolate Baroque Stamps and 7 Dots Studio Wonderland Collection (by Lesley)

Hello Everyone,  

Wow, where has the last month gone?  It doesn't seem that long since my week to post in February.  This month our DT pack consisted of some great stamps from Chocolate Baroque (I am a proud former member of the Chocolate Baroque DT and have worked with this lovely set of stamps before) following a chess theme and a fabulous set of papers, stickers and die cuts from 7 Dots Studio called the Wonderland Collection.

For my first project this month I decided to decorate a wooden icon the bosses included in our DT pack a couple of months ago, partly because  I've been itching to decorate it and partly because I think the shape compliments one of the images in the stamp set.  I stuck to monochrome colours of black(and gray) and white in keeping with most chess sets, although I was tempted and almost added a touch of colour, lol!


I gave the icon a coat of Gesso followed by a coat of white acrylic paint and then stamped the Stampendous Crumpled Edge on the background of the centre piece and on all the edges. I then stamped the Castle piece across the top of the arch and then ran a piece of black metal sheet through the TH Alterations Checkerboard Embossing Folder, sanded it and adhered it to the centre panel.  I followed this with the main image stamped onto white card.  


I stamped a large King and Queen into white air drying clay and left them to dry overnight before cutting them out then stamped the same images onto black Clearly for Art (using White Versamagic ink).  I heat dried the ink first then cut out the images, reheated and shaped the chess pieces round a bottle.  I stamped the fancy Knight down the left side and the fancy Bishop down the other and also onto post it notes which I cut out to create masks before using some plasterer's scrim to dab black ink through together with ink on the edge of a credit card to create texture on the side pieces.
 
 
On the back of the icon I distressed the edges a little with black ink and then cut out the full set of  Tim Holtz Alterations die - Royal Crest, from the 'Alice' 7 Dots Studio Paper.  I distressed these pieces with black ink also and then stamped the Knight and Bishop on the shield and the quote, which I curved on my acrylic block to fit, onto the banner.  I stamped the side panels with the plain images of the Knight and Bishop  and enhanced these with  black and gray pencils.


I then curved the shield and the banner slightly before adhering them with silicone glue to the centre panel.


and finally, I adhered the Clearly for Art and  Air Dry Clay pieces to the inside panels.


All the stamping in black was done using a black Archival inkpad.

Well, that's it from me for today.  I hope you get time to visit again later in the week when I hope to have another project for you showcasing the lovely 7 Dots Studio papers a little more.

Hugs
Lesley Xx

Saturday 10 March 2012

Design Team Project #3


Hello everyone ... I'm back with my last project this month featuring those gorgeous papers from 7Dots Studio & also "The Art Of Chess" stamp set from Chocolate Baroque.

I created this card using the following papers .... Alice and Spades & Clubs. To create some texture to the top of the paper, I sponged Distress Ink (Faded Jeans) through some plasterboard tape then repeated the step using Dylusions Spray in Worn Leather. I used the Sizzix Alterations Cabinet Card die to form the centre piece of the card.

That's it from me but do stop by on Monday when Lesley will be showcasing her design team projects, have a lovely weekend everyone whatever you have planned ....  TFL x

Thursday 8 March 2012

Design Team Project #2 Featuring .... Wonderland


Hello everyone ... I'm back sharing my 2nd design team project showcasing the gorgeous papers from 7Dots Studio  "Wonderland" collection. In this project I have used "Mushroom & Smoke".

To make this tag file folder, simply take a 12x12 piece of cardstock, fold from the bottom to the desired depth of pocket you require (3inches in this project), score with a Bone Folder, I used a glue stick to adhere the pockets at either side then fold cardstock in half again scoring with a bone folder. I then embellished the folder with elements from the following .... Stickers 6x12, Stickers 12x12 & Elements 12x12. On the back of the folder I use a punch to cut out circles from the Quadrille paper, again adhering with a glue stick and outlining with a charcoal pencil.

I covered a large manilla tag using "Royal Garden" paper, using Texture Paste through a stencil and again highlighting with a charcoal pencil. The paper doilie has been sprayed with Adirondack Colour Wash Spray (Butterscotch & Sunset Orange).

I have one more project to share this week , so until then TFL. x 

Monday 5 March 2012

Design Team Project Featuring ....

Hello everyone .... a huge thank you to everyone who stopped by and left a comment or shared their artwork with us during the Studio 490 month of February .... could it get any better .... oh yes indeedly ... the Design Team have some fab goodies to play with over the next few months .... watch this space for CHA 2012 releases (shhhh don't tell anyone I shared that with you)!!!

So onto this months project kit .... we have the latest release from 7Dots Studio "Wonderland" collection  .... oh YES to say I'm super excited is an understatement. I have to admit it took everything I had to cut into the papers/distress them ... does anyone else have a paper stroking phobia lol or is it just me!! I need to get more :)


We will also be featuring Chocolate Baroque "The Art Of Chess Stamp Set" ... more on that later in the week. HOWEVER .... One lucky person who stops by and leaves us a comment will be selected by Random.org at the end of the month and receive the "The Art of Chess Stamp set" as a prize!!!


To create the layout I used the following papers from the collection "Mad Tea Party, Spades & Clubs, Quadrille". I also used elements from the Wonderland Collection - 12x12 Die Cut Sheet, 12x12 Sticker Sheet & 6x12 Sticker Sheet. To obtain the worn edges I used a Tim Holtz Tonic Paper Distresser. Perfet Pearl Mist (Biscotti). I used a Stencil/Mask to achieve the mini gears background.

Other elements used available from Snazzy's .... Kaisercraft Wooden Flourish (Roman Clock), Ideaology Film Strip Ribbon, Distress Ink (Walnut Stain, Weathered Wood & Vintage Photo), The image, flowers and lace applique are from my own stash.

I will be back later in the week with some more projects to share, until then the Design Team thank you for your continued support, it is much appreciated.