Monday, 19 November 2012

The Christmas Gift-Velope By Hels

Gooooodly Morning Snazzyfans... blimey, I don't know about you but November has whizzed past and my thoughts are now turning to Christmas and pressie-time.  I am sometimes a bit useless at buying gifts for loved ones so I tend to get a nice gift card or voucher... and usually they come with cards from the store, which are invariably all a bit samey.  So, I hit on the idea of making a little Gift-Velope so I can pop cash or a voucher or a gift card into it, the recipient will then have a little keepsake that they can keep or display over Christmas.  To make it is simples and using the new Teresa Collins Christmas Cottage papers makes it even more simples because this paper is actually a really decent thickness, tis more like a cardstock, so it is sturdy enough to score and fold and stands up to being handled.  Add to that the lush designs, well, like I said, simples!  Here are the measurements if you fancy making some yourself:


Cut a piece of paper to measure 26cm x 13cm.  Along the long edge score in from the left at 8.5cm and 9.5cm.  This will make your first foldy bit.  Then score and fold again at 19cm and 20cm.  This is your second foldy bit (do you like the technical terms I am using? lol)  Then use a bone folder or similar and fold your scored lines and press a nice crease into the paper.  Snip the left hand flap at angles of 45degrees so you have a tag top shape (as shown)   Cover the inside with co-ordinating papers, this not only makes it prettier, it also adds some more dimension to the design.


For the pouch, cut a piece of paper to measure 9.5cm in height and 26cm in length.  Score and fold the paper so it has an over-flap of 1.5cm at one end, this will then fold over to secure the pouch together.  Finally, stick the bottom of the flap together and glue to the inside fold as shown.  For the closure I used a couple of punched 1/2" circles that I popped a couple of the co-ordinating Teresa Collins brads through and used Paper String to fasten the flaps together.  All of the cut edges of my papers were blended with Frayed Burlap Distress Ink just to tone them in and add a smidge of vintageness to the design.


I added a couple of Alterations Snowflakes, also cut from the gorgeous papers and then popped a couple of little bells on for a bit of decoration.  I also diecut the 25, coated it with Glue & Seal and then sprinkled Rock Candy Dry Stickles over to add some blingyliciousness to the design.   I hope that you do make some of these, please do let me know - they are a doddle to make but if you have any probs, just bob me an email over and I will try to explain better!   As ever, these delicious goodies are available from Snazzy's... check out their website for lots of new stashly goodies added regularly.  Oh and don't forget, Snazzy's are offering this months' Design Team kits for a discounted price... seriously GREAT value cos there are stamps in the kit too which I haven't used yet!!  Please do scroll back over the previous posts to see the gorgeous creations my teamies have also been making... they are all using the same products... but all so different so lots of inspirations for you all.    Oh and before I go... if you CLICK HERE you can leave a comment and be in with a chance of winning the DT kit we have been working with (obvs a new one, not the ones we have chopped up!)    Thanks for looking!

TTFN


Thursday, 15 November 2012

DT Project #2 showcasing Christmas Cottage Collection by Theresa Collins Posted by Astrid


Hello everyone and welcome to another project showcasing this wonderful Christmas collection. If this is your first time here, make sure to scroll down to see all the great projects posted already. You could even be in with a chance to win the collection, all you need to do is leave a comment on the first project here

For my second project I decided to make a folder to hold favourite Christmas photos
I started with a piece of A 4 Kraft card and cut it at 6". I then scored 5 1/2" from each side which left me with a spine that ensured space for some embellishments and pockets to hold photo mats on the inside:


I lined both the front and the back first with a square of vanilla card stock then with one of the papers and then embellished it with a strip of lace, a strip of the paper, edged with a Martha Stewart punch, a die cut cut from Kraft card and some elements from the paper collection and a piece of ribbon from my stash, as shown on the photo.


I lined the inside again with vanilla card stock and then made pockets as shown from the papers. The Tim Holtz  Tattered Doily on the left pocket was cut from one of the papers, as was the strip on the right side. Most of the other bits are elements from the collection.
Here are a couple of close up photos:


Next I cut some double photo mats from vanilla card stock to fit inside the pockets. I lined just the front of them with further pieces of the papers for photo mats and left the inside blank, either for further photos or journalling. Here you can see the photo mats inside the pockets.


I added some Vintage Photo Distress ink  around the edges to give it some definition and that was it. Quick , easy and a fun way to keep some favourite Christmas photos in a handy place together.

Well, that's it from me for this time, but don't forget to come back on Monday when Hels will start to share her projects for the final week of showcasing these beautiful papers and stamps.


Monday, 12 November 2012

DT project #1 featuring Teresa Collins’s Christmas Cottage Collection by Astrid


Hello everyone and welcome to the Snazzys blog. Regulars will know that this month we are featuring the wonderful Christmas Cottage collection by Teresa Collins. Like usual you have a chance to win this collection, all you have to do is leave a comment on the first post here Make sure to also check out all the other fabulous projects my teamies have been creating so far!


Every once in a while I enjoy doing a good old paper crafting project, so away goes the gesso, brushes and paints and all the arty cool stuff, and out come the scissors, ruler and glue. The moment I saw these wonderful papers they spelled Christmas Gifts to me, and just such  good old crafty fun, these lovely traditional look papers just lend themselves to that perfectly.
Now the project on the right is not a card as you may think but a little tea light gift box. Here you can see the inside:


I’ll do a quick little step by step for you, just in case you want to make one yourself:
What you will need:
Papers from the collection
3 sheets of strong A4 Card
2 tea lights
A match box (I used a Swan one which is just the perfect size).
1. Take one piece of card and cut at 5” along the long side.
2. Score at 5”, 6” and 11”, the remaining bit becomes  a glue tab.


3. Do the same with a second piece of A4 card and glue together as shown. The second square will over lap, this gives the base of your box strength.


4. Make the inside box for the lights and matches by cutting a 5” square out of your third piece of card, and score at 3/4” round all for sides, cut slits as shown for the glue tabs. and fold and glue together.


5 Now comes the fun part of covering everything with bits of your chosen papers from the collection. I made mine just 1/4 “ smaller than each of the panels Glue the little box onto the base of the inside of the outer box and apart from embellishing you are done!


Here you can see how I covered the match box:


And here is some more detail on the front of the box:


I used various Tim Holtz and Spellbinder dies from my stash to embellish my box as well as some of the lovely brads and die cuts that come with collection. I also used the stamps from the collection for all the sentiments. I adhered some small magnets on the inside of the cover and underneath the flap to hold the box closed.

Alright, now for the little house, – this is actually not just a deco piece but can also be a little gift box as the roof comes off  to hold some special Christmas baking.


I have created a template for this. The easiest way to make the house is to cut one of the papers to A4 size and print the template straight on to it. Alternatively you can print on to a bit of card and then use that as a template for the house by tracing it onto the card stock from the collection.

Once cut, folded and glued together you can again decorate it to your hearts content. Here are some pictures of how I did mine.


Well I hope you enjoyed this little project and maybe you feel inspired to make some gifts like this your self. The quality of these papers is superb and strong enough to make these boxes sturdy!


I’ll be back later on in the week with another project, so until then, stay crafty!


Friday, 9 November 2012

DT Project #3 by Minxy Featuring:

Christmas Cottage by Teresa Collins

Hiya Gang
Sorry for the delay in today's posting.. Like a muppet I lost track of my days then realised I had the dentist so couldn't post on time. {Hope you can forgive me}
But i'm here now to finish off my week with some simple gift bags/pockets.


 I used my Tim Holtz dies to cut the shapes but there are many online templates you could also use.
Do you remember the strip of paper I saved from the scrapbook layout, Well that middle strip made both the bags, I did one using each of the patterns, and because they are double sided the inside looks as pretty as the outside.


I used the CC acrylic stamps to make the tags, adding a little snowflake charm for added bling, and more CC papers for a couple of snowflakes to jazz up the pocket, and one of the CC die-cut shapes.
***
And that concludes my week, But don't forget that you still have some wonderful projects coming from both Astrid and Hels in the next couple of weeks.
Thanks for visiting, Don't forget to comment so I know you stopped by x
Stay Inky

Wednesday, 7 November 2012

DT Project #2 by Minxy Featuring:

Christmas Cottage Collection by Teresa Collins

Hiya snazzy gang, Here I am back again as promised with my second offering.

A great way to show off pretty papers is of course with a scrapbook layout.


I used Snowflakes #CC1004 and the reverse of Tiny Flowers #CC1001 as my base page, Rather then waste all the tiny flower paper that would of been lost behind the snowflake sheet, I cut stripes for the top and bottom and keep the centre piece for another project which i'll be sharing on friday. 
I built up layers beneath my photo using off cuts and scraps, as well as a pretty heart doily {snazzy's sells a really great doily mix pack}

I always plan my pages and get everything where I want it before I stick anything down, I also take a quick pic with my phone so I don't forget the layout when I start moving bits to stick everything down.
My glue of choice is cosmic shimmer glue.


I used lots of the elements from the die-cut sheet that came in the paper pack.
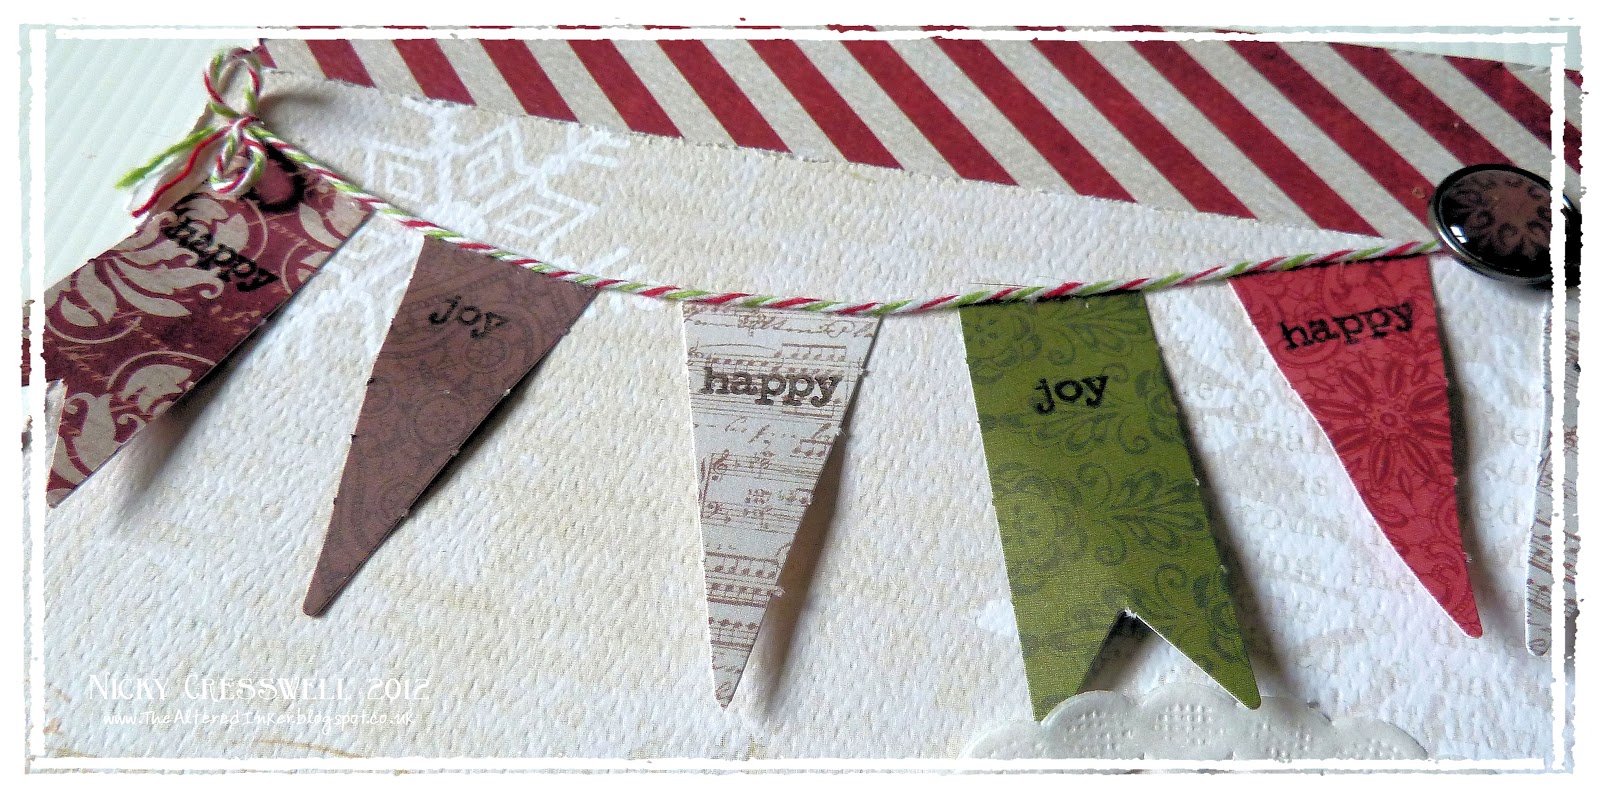
And used the Christmas Cottage acrylic stamps to add words to the string banner. 


I continued to add more of the CC die-cut elements, and some Prima mistable pieces and a Prima wood button till I was happy with the overall look, finishing off with some CC decorative brads
All that's left is for me to add a bit of journalling so I know when and where the photo was taken.

I hope you have enjoyed today's offering
I'll be back on Friday with my last project.
Don't forget to be in with a chance of winning a little prize leave me a comment and then hope along to THIS POST and leave a comment there also.
Till next time..
Stay Inky

Monday, 5 November 2012

DT Project #1 by Minxy, Featuring:

Christmas Cottage Collection by Teresa Collins

Hay Snazzy Gang
Nicky here with another fun filled week of Christmas cheer!
If this is the first time visiting in a while do scroll back as both Gillian and Lesley have made some fab projects.

So to kick start my week I made these fun little Christmas tree ornaments.


They started out as plain black plastic curtain rings, I used gold alcohol ink mixative on the rings leaving some black showing to give them an aged look.
I then punched out circles of the different Christmas cottage papers, and distressed round the edges with vintage photo distress ink.


I ran a thin layer of cosmic shimmer glue round the edge of the paper and stuck it to the ring.
 I knew I wanted some little angels for the centre's so had a look online and found a great 1" circle angels digi sheet on Etsy. {The seller: Crafty Button Design}


 I cut out all my angels and stuck them in, I then filled the edges with rock candy distress stickles topped with extra 'dry glitter' rock candy stickles for added shimmer and twinkle. 
I also gave the angels a coat of glossy accents.


When they were all dry I turned them over and stuck snowflake rosettes made from more of the Christmas cottage papers to the back. Because the papers are double sided it didn't matter about any overhang from the rosettes. 
When hung from the tree they look pretty on both sides.
I hope you have enjoyed today's offering, I'll be back again on Wednesday with my second project.

Till Then...Stay Inky

Thursday, 1 November 2012

DT Project #2 showcasing Christmas Cottage Collection by Theresa Collins (posted by Lesley)

Hello again everyone.

As promised I'm back today with my 2nd project for this month showcasing the wonderful collection by Theresa Collins called Christmas Cottage Collection.  I will apologise in advance as this post is perhaps a bit of a photo overload, lol!  For my 2nd project I decided I wanted to show these lovely papers off and hopefully incorporate some of the stamps, die cuts and brads too so I decided to make a Christmas Organiser which would make a lovely gift (or so my DD informed me....... I think there was a heavy hint being dropped there, lol)

Front Cover

All the dividing pages were made using various designs in the paper collection and the pages for collecting all the 'information' on were cut from some Kraft cardstock in my stash.  I made good use of quite a few of my neglected dies, punches and embossing folders too.  As with the front cover many of the dividing pages are inked around the edges with Distress Ink and I've also edged each page with Gold Metallic Distress Stain. I've done quite a bit of stamping and heat embossing with Versamark and WOW Vanilla White embossing powder......... love the WOW powders but this one is my favourite I think!


Detail of Tim Holtz die cut snowflake using one of the papers and beautiful brads from the collection.
Wordy Christmas tree from the stamp set highlighting the star with Glossy Accents. I also edged the tips of the snowflake with clear Rock Candy Dry Glitter but you can't see it on the pic.


Pocket on inside front cover (inside back cover is the same) and gold pearl vellum dry embossed with a folder and one of the die cuts from the collection added.  There is another similar page at the back of the organiser which I somehow missed photographing.


First divider with a Tim Holtz die cut reindeer


Second divider with pocket and WOW Vanilla White embossed snowflakes from the stamp set.


Reverse of previous divider with punched snowflakes.


Next one with more of the pretty stamps and WOW embossing....


 ... and the reverse using bunting pieces from the die cut sheet in the Christmas Cottage Collection which have WOW embossed stamped words from the set.

The next two dividers are repeats of the second and front of the third but ...


...this is the reverse of the third.  I stamped the smashing wordy Christmas tree (love this tree stamp) using Versamark and heat embossed with the WOW embossing powder onto one of the fabulous papers.  This one is a wonderful wood grain effect design and I have plans for using some more of this with some Studio 490 Art Parts as soon as I can (unfortunately not in time to blog on here this week :-( ) .  I then cut the tree into strips and adhered them to my page, sometimes with double sided tape or foam pads.


And finally, ;D, the back cover which I just realised I had one of the die cuts earmarked to add on here ....... and it appears I forgot, lol!  The poinsettia were cut with a die of my own and I used some more of the lovely Christmas Cottage Collection brads for the centres.

I used my long neglected Bind-it-All to bind the pages together and finished off with bits of ribbon and lace.

I had a lovely time making this organiser which, by the way, is 6" x 6".  Just about everything I used (except for the dies) can be purchased from the wonderful Snazzys and of course, you can buy the full DT pack at a discounted price.  I cannot say how gorgeous these papers are.  The lovely traditional reds and greens with a mix of vintage and 'modern' designs.  They are a good weight and take ink and embossing exceptionally well and also have a beautiful texture to them.  Can you tell I really like this whole collection!  Don't forget if you leave a comment HERE you will be entered into the Snazzys draw for this month.

I'm hoping to get back before the end of the week with another quick make but if I don't make it I'll see you again in a few weeks ........ less than 8 weeks to Santa's visit now, lol!  Next week Minxy will be back with some more inspiration too.

Till next time, have fun