Hello dear Snazzy visitors and happy Thursday to you all.
For my second project this month I made a little tag book:
I used size #10 Manila tags and covered both sides with the wonderful papers. I then used stencils, inks and stamps to decorate them. Though the outside is quite chunky, I left the inside fairly plain to really showcase the beautiful papers. I had great fun decorating them all.
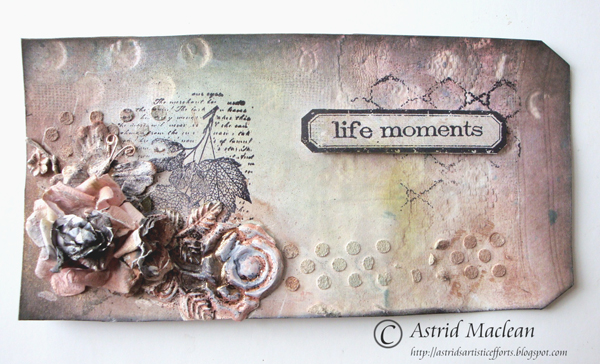
Here's the front cover before I bound it together, this is the only page I embellished, I also added some texture paste through a part of the Hero Arts Stencil. The sentiment is from the Tim Holtz Simple Sayings set.
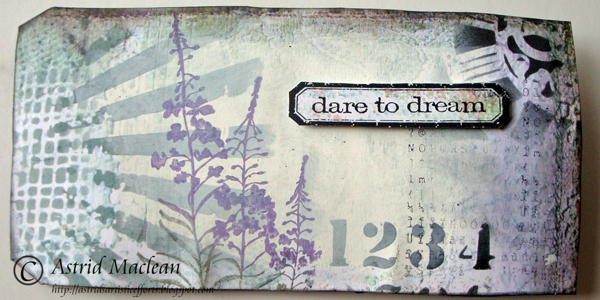
Here I used the new Tim Holtz stencils and some stamps from my stash Sentiment is from the same set.
More stenciling, some background stamping with Prima stamps from an earlier DT kit and the butterflies are of course from the Tim Holtz Papilon set and the Hero Arts Notebook Essentials stamp that came with the DT kit.
Here I used the Tim Holtz Classic #1 set and the Hero Arts stamps as well as the stencil from Hero Arts
More stamping and stenciling and using the same stamp sets again plus some chit chat stickers
Nearly there.... this time using the beautiful Dragon fly
And for my last page a la Blanche stamp from my stash
Finally the back cover is just from the papers with nothing much added to it at all.
Well, hope you like my little tag book. I had great fun stenciling and stamping, trying to pick up on the colours that are there in the papers already. I found Victorian Velvet, Weathered Wood, Broken China, Tea Dye and Black Soot Distress inks all blend to perfection with the colours of these papers.
Well, that's it from me for this month. I'm off to Swindon tomorrow to meet up with all the Snazzys folk, can't wait, and who knows, I might see you there :)
Don't forget to come back on Monday when Hels will be here to show us her take on these wonderful papers and stamps!!
Showing posts with label Tim Holtz Distress Inks. Show all posts
Thursday, 29 August 2013
Monday, 4 March 2013
"Positive Affirmations for Life" Snazzy DT Project #1 Prima Engraver Collection by Astrid
Hello everyone, welcome and thank you for visiting!!! Astrid
here and I am guessing that as I am the 4th in line for showing you
this month’s DT kit that by now you will know that we are show casing the most
wonderful Prima EngraverCollection!!!
I had so much fun creating my first project, it almost made
itself with these lush papers. The hardest bit was cutting into them, they are
soooooo gorgeous.
However, needs must, so cutting into them I did, and this is
what I came up with: A Positive Affirmations for Life tag card. This is what I
used:
Two papers from the collection: Atlas and Roulette. I also
used a #12 Ranger Tag , a piece of Ranger Manila Card Stock,
Walnut Stain Distress Ink and the Sizzix Alterations Tattered Doily Die also by said Mr Holtz and a
piece of vintage seam-binding which I died with Antique Linen and a tinsy bit of Walnut Stain Distress Ink. Then I used
all of the stamps to embellish my card, some of the roses and words cut out from
the packaging the stamps came in. Prima always make the most gorgeous packaging
for their stuff! I also used one of the clear stamps that comes with this collection but is not actually part of the kit, but then at the cost of £2, that's not a big deal...
So this is what I did: I scored my tag 3” from the shaped
side and 2.5” from the other side, this gave me a basic gatefold card. Next I
cut the doily die from my manila cardstock and adhered it to the shaped side of the tag.I then covered both the inside and the outside with the
papers and edged everything with the Walnut Stain Distress Ink. When that was
done the fun of embellishing began. I’ll let the photos tell the story.
Here you can see some of the detail of the doily and the lush flowers. I used computer generated words for "Affirmations", and for the word "Living" this was cut from the packaging.
Here you can see the inside of the booklet. The butterfly is one of the stamps which I cut out. The words are all from the packaging apart from the word Memories which was one of the stamps. Another doily makes the pocket for the tag, the embellishments on it are all stamped images cut out. The closure is a little magnet hidden under the heart on the left.
And here finally are the front and back side of the tag. Again, it was covered with the papers, stamped on and embellished with stamps and words from the packaging.
Last of all, here you can see the tag inside its pocket.
Well that's it for today, hope you liked what I made and remember, if you want to be in with a chance to win this super collection, leave a comment here. Oh and just if you are wondering, clicking on the thumbnails below will take you straight to the products in Snazzys online shop!!
Thank you for visiting and I will be back later on in the week with another project.
Thursday, 15 November 2012
DT Project #2 showcasing Christmas Cottage Collection by Theresa Collins Posted by Astrid
Hello everyone and welcome to another project showcasing this wonderful Christmas collection. If this is your first time here, make sure to scroll down to see all the great projects posted already. You could even be in with a chance to win the collection, all you need to do is leave a comment on the first project here
For my second project I decided to make a folder to hold favourite Christmas photos
I started with a piece of A 4 Kraft card and cut it at 6". I then scored 5 1/2" from each side which left me with a spine that ensured space for some embellishments and pockets to hold photo mats on the inside:
I lined both the front and the back first with a square of vanilla card stock then with one of the papers and then embellished it with a strip of lace, a strip of the paper, edged with a Martha Stewart punch, a die cut cut from Kraft card and some elements from the paper collection and a piece of ribbon from my stash, as shown on the photo.
I lined the inside again with vanilla card stock and then made pockets as shown from the papers. The Tim Holtz Tattered Doily on the left pocket was cut from one of the papers, as was the strip on the right side. Most of the other bits are elements from the collection.
Here are a couple of close up photos:
Next I cut some double photo mats from vanilla card stock to fit inside the pockets. I lined just the front of them with further pieces of the papers for photo mats and left the inside blank, either for further photos or journalling. Here you can see the photo mats inside the pockets.
I added some Vintage Photo Distress ink around the edges to give it some definition and that was it. Quick , easy and a fun way to keep some favourite Christmas photos in a handy place together.
Well, that's it from me for this time, but don't forget to come back on Monday when Hels will start to share her projects for the final week of showcasing these beautiful papers and stamps.
Subscribe to:
Posts (Atom)