Monday, 5 November 2012

DT Project #1 by Minxy, Featuring:

Christmas Cottage Collection by Teresa Collins

Hay Snazzy Gang
Nicky here with another fun filled week of Christmas cheer!
If this is the first time visiting in a while do scroll back as both Gillian and Lesley have made some fab projects.

So to kick start my week I made these fun little Christmas tree ornaments.


They started out as plain black plastic curtain rings, I used gold alcohol ink mixative on the rings leaving some black showing to give them an aged look.
I then punched out circles of the different Christmas cottage papers, and distressed round the edges with vintage photo distress ink.


I ran a thin layer of cosmic shimmer glue round the edge of the paper and stuck it to the ring.
 I knew I wanted some little angels for the centre's so had a look online and found a great 1" circle angels digi sheet on Etsy. {The seller: Crafty Button Design}


 I cut out all my angels and stuck them in, I then filled the edges with rock candy distress stickles topped with extra 'dry glitter' rock candy stickles for added shimmer and twinkle. 
I also gave the angels a coat of glossy accents.


When they were all dry I turned them over and stuck snowflake rosettes made from more of the Christmas cottage papers to the back. Because the papers are double sided it didn't matter about any overhang from the rosettes. 
When hung from the tree they look pretty on both sides.
I hope you have enjoyed today's offering, I'll be back again on Wednesday with my second project.

Till Then...Stay Inky

Thursday, 1 November 2012

DT Project #2 showcasing Christmas Cottage Collection by Theresa Collins (posted by Lesley)

Hello again everyone.

As promised I'm back today with my 2nd project for this month showcasing the wonderful collection by Theresa Collins called Christmas Cottage Collection.  I will apologise in advance as this post is perhaps a bit of a photo overload, lol!  For my 2nd project I decided I wanted to show these lovely papers off and hopefully incorporate some of the stamps, die cuts and brads too so I decided to make a Christmas Organiser which would make a lovely gift (or so my DD informed me....... I think there was a heavy hint being dropped there, lol)

Front Cover

All the dividing pages were made using various designs in the paper collection and the pages for collecting all the 'information' on were cut from some Kraft cardstock in my stash.  I made good use of quite a few of my neglected dies, punches and embossing folders too.  As with the front cover many of the dividing pages are inked around the edges with Distress Ink and I've also edged each page with Gold Metallic Distress Stain. I've done quite a bit of stamping and heat embossing with Versamark and WOW Vanilla White embossing powder......... love the WOW powders but this one is my favourite I think!


Detail of Tim Holtz die cut snowflake using one of the papers and beautiful brads from the collection.
Wordy Christmas tree from the stamp set highlighting the star with Glossy Accents. I also edged the tips of the snowflake with clear Rock Candy Dry Glitter but you can't see it on the pic.


Pocket on inside front cover (inside back cover is the same) and gold pearl vellum dry embossed with a folder and one of the die cuts from the collection added.  There is another similar page at the back of the organiser which I somehow missed photographing.


First divider with a Tim Holtz die cut reindeer


Second divider with pocket and WOW Vanilla White embossed snowflakes from the stamp set.


Reverse of previous divider with punched snowflakes.


Next one with more of the pretty stamps and WOW embossing....


 ... and the reverse using bunting pieces from the die cut sheet in the Christmas Cottage Collection which have WOW embossed stamped words from the set.

The next two dividers are repeats of the second and front of the third but ...


...this is the reverse of the third.  I stamped the smashing wordy Christmas tree (love this tree stamp) using Versamark and heat embossed with the WOW embossing powder onto one of the fabulous papers.  This one is a wonderful wood grain effect design and I have plans for using some more of this with some Studio 490 Art Parts as soon as I can (unfortunately not in time to blog on here this week :-( ) .  I then cut the tree into strips and adhered them to my page, sometimes with double sided tape or foam pads.


And finally, ;D, the back cover which I just realised I had one of the die cuts earmarked to add on here ....... and it appears I forgot, lol!  The poinsettia were cut with a die of my own and I used some more of the lovely Christmas Cottage Collection brads for the centres.

I used my long neglected Bind-it-All to bind the pages together and finished off with bits of ribbon and lace.

I had a lovely time making this organiser which, by the way, is 6" x 6".  Just about everything I used (except for the dies) can be purchased from the wonderful Snazzys and of course, you can buy the full DT pack at a discounted price.  I cannot say how gorgeous these papers are.  The lovely traditional reds and greens with a mix of vintage and 'modern' designs.  They are a good weight and take ink and embossing exceptionally well and also have a beautiful texture to them.  Can you tell I really like this whole collection!  Don't forget if you leave a comment HERE you will be entered into the Snazzys draw for this month.

I'm hoping to get back before the end of the week with another quick make but if I don't make it I'll see you again in a few weeks ........ less than 8 weeks to Santa's visit now, lol!  Next week Minxy will be back with some more inspiration too.

Till next time, have fun


Monday, 29 October 2012

DT Project #1 showcasing Christmas Cottage Collection by Theresa Collins (posted by Lesley)

Hellooooo lovely Snazzy visitors!

I hope all our UK friends enjoyed their extra hour's sleep yesterday morning, lol!  Unless, like me you wake after a certain number of hours no matter what the clock says.  

Anyway, I've been having some happy time in my craftroom finding ways to use the lovely DT goodies we were sent by our equally lovely 'Bosses' this month.  This month we were sent a gorgeous set of papers, die cuts, stamps and brads called the Christmas Cottage Collection by Theresa Collins and  today I'm sharing another home decor idea.


To any novice crafters out there this was my very first attempt at decorating candles ....... ahem...... who's saying 'looks like it too', lol.  Seriously though I've had those candles at least two years which I bought specifically to have a go at decorating but never got round to trying it until now.  I won't say I found melting the tissue into the wax particularly easy but I'm sure I would get better with a bit more practice......  and I only got a couple of tiny wrinkly bits, ;D!  It was fun to try as well.

 I stamped the wordy Christmas tree from the Christmas Cottage Collection stamps four times onto tissue paper alternately using Bundled Sage and Aged Mahogany Disress Inks, wrapped the tissue around the candle then covered with a piece of greaseproof paper which was big enough for me to hold together with my hand while I used my heat gun to  melt the wax sufficiently to 'absorb' the tissue paper.  I moved the greaseproof paper around the candle until I had heated all the way round.  I then added some tiny star gems here and there and finished off with a band of one of the Christmas Cottage Collection papers punched with a tree border punch.


For the second candle I used the pretty snowflake and the tiny word stamps from the set and again finished with a punched paper border.  The teeny snowflakes cut by the border punch I stuck to the candle here and there adding tiny gems to the centres.

Well, that's it from me today but I have another project for you later in the week which moves away from the home decor items.  I hope you get chance to pop back then and don't forget if you would like to be in with a chance to win some of the Christmas Cottage Collection goodies leave a comment HERE on Gillian's post.

Have a Happy Monday and see you later.


Friday, 26 October 2012

Design Team Project #3 .... Distressed Old Bird

Hey Snazzy followers it's time to share my third and final project this week using the Christmas Cottage Collection by Teresa Collins .... meet the "Distressed Old Bird"


For todays project I started out by using the Studio 490 Birds With Wings Art Part Set which has been covered with the Medallion cardstock from the collection, I then stamped the "music notes" from the Christmas Cottage Clear Stamp Set in Archival Ink (Coffee). I adhered the paper using Cosmic Shimmer Glue


I inked the cog which is from the Steampunk Gears & More Art Parts Set with Distress Ink Festive Berries then stamped the star image from the Christmas Cottage Clear Stamp onto the brad which is from the Decorative Brad Set. The hat is from Blossom Bucket Embellishments by Studio 490 which I have coloured using Treasure Gold (Onyxite).


As with the steps above I used the reverse cardstock from Doily Trees, stamping the "25" image again from the Christmas Cottage Clear Stamp Set this time using Archival Ink (Jet Black) then adding some Tim Holtz Ideaology.

For the legs I cut out cardstock from the collection (Countdown & Tiny Flowers) again adding some Tim Holtz Mini Gears. The wooden base was inked with Distress Ink (Gathered Twigs) and highlighted with Treasure Gold (Renaissance).

I hope you have enjoyed the christmas decor ideas this week, don't forget to leave a comment HERE if you want to be in with a chance of winning this months random comment draw prize.

Until next time stay inky. X


Wednesday, 24 October 2012

Design Team Project #2 ... A Christmas Cottage

Good morning Snazzy followers ... today I'm back sharing my 2nd project of the week ..... "A Christmas Cottage" featuring the Teresa Collins Christmas Cottage Collection.


I have used various bits n bobs from the Tim Holtz Ideaology Collection


12x12 cardstock (reverse of Tiny Flowers)


Thanks for stopping by and leaving a comment, .... I will be back on Friday with my last project of this month.  To be in with a chance of winning this months random comment prize, be sure to leave a comment HERE.

TFL X


Monday, 22 October 2012

Design Team Project #1 Featuring Teresa Collins ....

Good morning everyone ..... Gillian here to kick start our next design team collection (and oh what a beauty it is) .... firstly though a huge *Hello* to all our new blog followers thanks for stopping by and leaving us all such lovely comments.

The winner of last months random comment is #15 .....


which consides with a comment left by Butterfly aka Alison .... congratulations Alison please can you e-mail your details HERE

So onto this months collection .... we are using the beautiful Christmas Cottage Collection by Teresa Collins along with the co-ordinating stamp set.


My first project this week is using a Paper Mache Hanging Board (my fav item to alter) which is available from Snazzy's

I started out by painting the board with Fresco Paint (Toad Hall) then layering the following papers from the collection (Sentiments & Tiny Flowers).


I then added a layer of metal wire which was coloured using Fresco Paint (French Roast). I then stamped the "Christmas Tree" from the clear stamp set using Memento Ink (Rhubarb Stalk) onto a die cut from the 12x12 Double Sided Die Cut Accessories Sheet.

I die cut the Snowflake Rosette with the "Music" cardstock and attached the brad which is from the Decorative Brad Set.


The little metal snowflake which is available in a set from Snazzy's was highlighted using Treasure Gold.


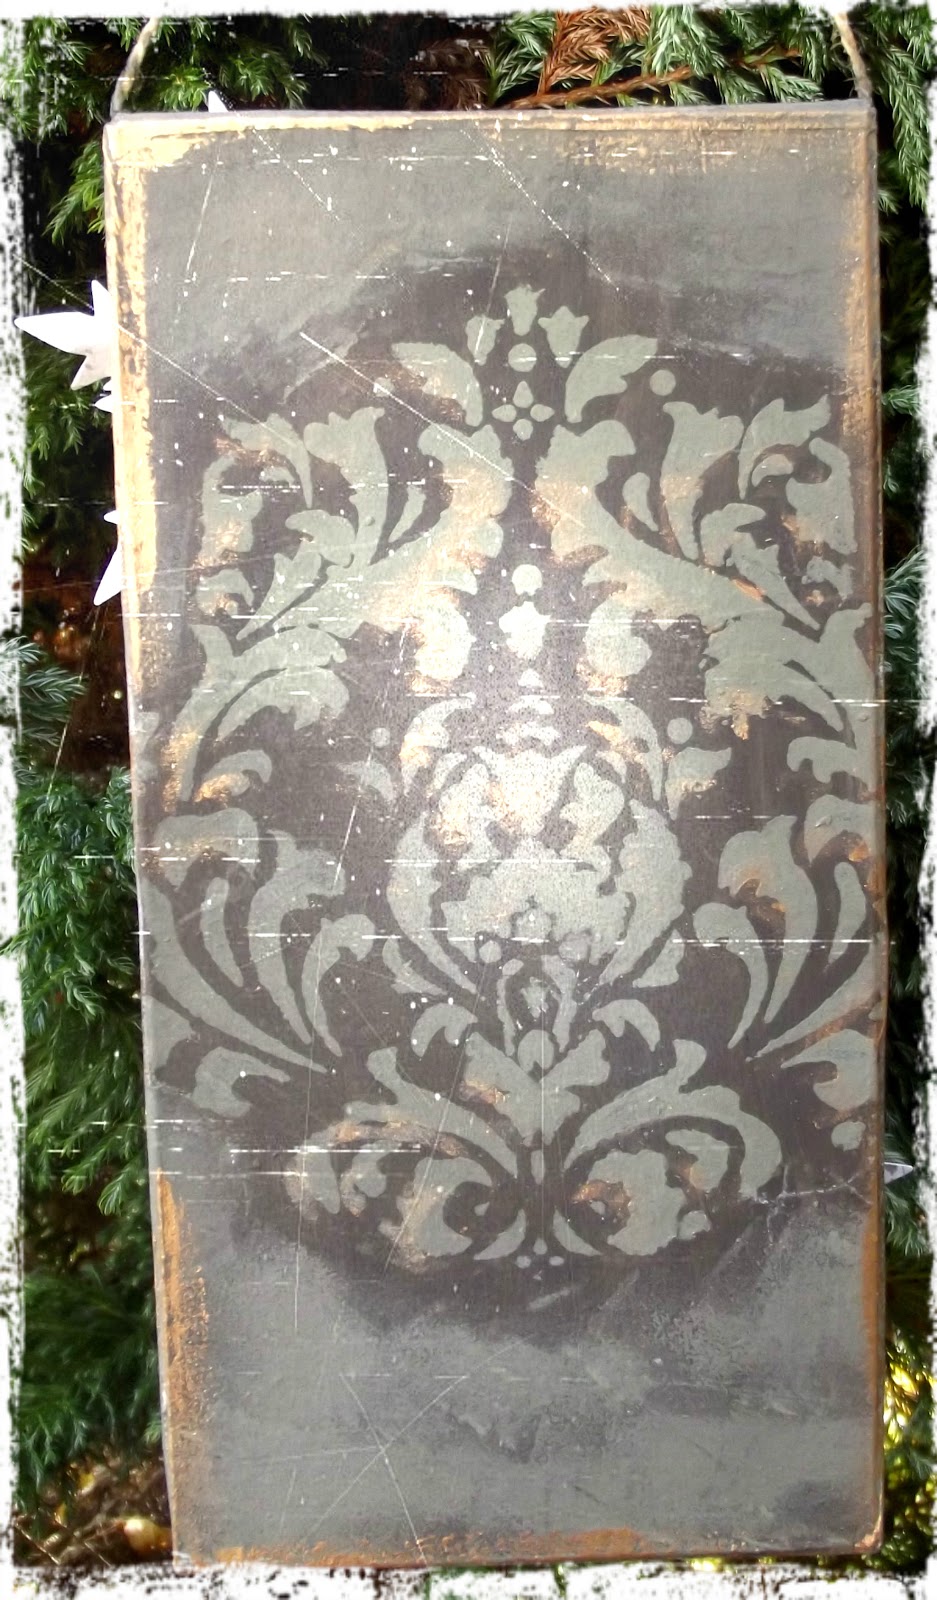
To decorate the back of the board I have used Fresco Paints (Toad Hall & French Roast) with a Crafters Workshop Stencil & Treasure Gold to highlight.

Thanks for stopping by and leaving a comment to let me know you have been here .... don't forget if you leave a comment on this first post you will be entered into the random comment draw which will be drawn on the 26th of November. Good Luck everyone.

I will be back later in the week with some more projects to share. TFL x


Friday, 19 October 2012

Hallowe'en Part 2 By Hels

Goooooodly Morning Snazzyfans, tis I, Hels, back again with my other Hallowe'en project for this month.  I have concentrated on the Hallowe'en Blueprint stamps for this project because the other one was mostly about the Carta Bella All Hallow's Eve papers.  Did you know that you can buy the DT kits we get sent (not the actual kits we have because they wouldn't be full... I shall shut up now)  HERE are all the deets on how to get your inky mits on them... and if you buy them together there be a discount to be had too!  Oh and while I think on, did you know the Snazzy website is getting fuller so do pop over to see what goodies are there... and it is being added to regularly too!  HERE is a linky for that one.


So, being as I am in a spooky kind of mood, I decided to stick with the 3D decoration thing that I have going on at the moment.  The base is a wooden shadowbox which is approx 8" square so you have an idea on the sizing of my project.  The base was given a quick coat of Eggplant Dabber and then I used some Crackle Medium and bobbed a coat of Pitch Black Dabber over the top.  My Crackle stuff is ancient so the crackles are a bit disappointing, so I grabbed a scratchy tool and scrubbed a bit... well, it is sort of crackled.   The insert is some Tim Holtz Paper and I dripped some Red Pepper and Pitch Black Alcohol Ink down inside it so it looked a bit more spooky, like spiders blood or something.


I filled up some Corked Vials with more of the Alcohol Ink and made some little labels using Tim stamps... adding a smidge of Alcohol Ink to the labels and corks to make the bottles look well used.  I wanted to add some kind of spider web to the frame but was puzzling over what to stamp it with... when all of a sudden, like a bolt of the proverbial, I hit on the idea of stamping with Ranger's Glue & Seal and then sprinkling the new Rock Candy Dry Stickles over the top... it worked! I am chuffed about that!


The Bats are stamped onto Grungepaper, coloured with Pumice Stone and Black Soot Distress Ink and then curled to make them look like they are flapping about.  The Skull and Tombstone are both stamped onto white card and cut out. The Skull has a smidge of Black Soot DI to make him a bit less standy=outy and the Tombstone has been snipped down the side and folded so it looks a bit more 3D.  I coloured this with Pumice Stone and Black Soot DI.   Kitty is a little cutie isn't he?  He has been stamped twice, I layered up his head and back legs, adding a couple of brads so he is a bit mobile and then 3D'd him onto the frame.  Finally, another couple of spiders.  The first one is cut from Clearly for Art Blackout using an Alterations die and heated to curl the legs a bit.  The other one is from my pack of Hallowe'en critters from the £1 shop.


And there you have it.  I have been trying to think of ways to get some kind of lantern light into the box but struck a big fat blank... if I was handy with a drill I might have drilled holes and added fairy lights just poking through but I am rubbish with anything that may cause skin to be cut lol  OOoooh and whilst I think on, you still have a couple of days to enter this months giveaway... all the deets are HERE for that.  Thanks for looking... Happy Haunting!  TTFN


^0v0^ ^0v0^ ^0v0^ ^0v0^ ^0v0^ ^0v0^ ^0v0^ ^0v0^ ^0v0^ ^0v0^ ^0v0^ ^0v0^ ^0v0^