Friday, 11 May 2012

Snazzy DT Project #3


 Hello everyone, I'm back with another quick & simple make using PanPastels. I started out by applying Magenta PanPastels to a 6x6 Kraft card. I then stamped the Kaisercraft Bird Cage Stamp using Versamark, then adding another layer of Magenta PP. I then overstamped the Bird Cage stamp using Archival Ink (Jet Black). The stars & script images are from 7Gypsies Lile Collection, the border along the bottom of the card which was again stamped with Versamark, then appling Magenta PP over the top is from Kaisercraft Duchess Collection. The flowers & ribbon have been edged with Yellow Ochre & Magenta as has the wooden butterfly embellishment from Kaisercraft.

That's it from me, can't wait to see what Lesley has instore for us next week using PanPastels.

Wednesday, 9 May 2012

Snazzy DT Project #2 Featuring Panpastels

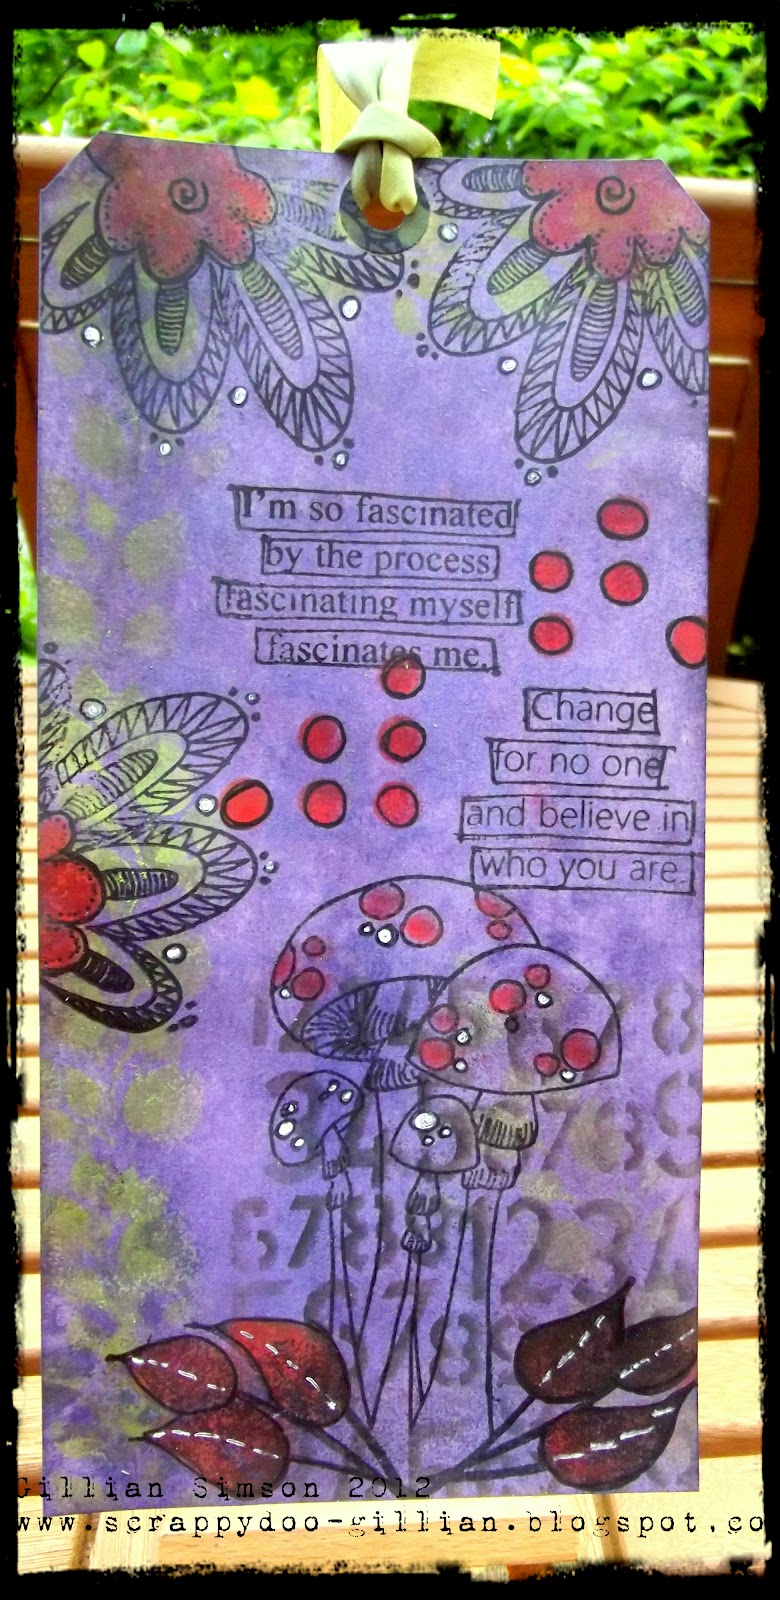
 Good morning everyone .... today I'm back with a simple and quick project using the oh so versatile PanPastels. All stamps & stencils are from the Dylusions range which are available at Snazzy's. I wanted to try an re-create the bold colours that you associate with Dyan's products that would normally be achieved using the Dylusion Inks. I started out by applying Violet PanPastels to a manilla tag. I then sponged Bright Yellow Green PanPastels through the Luscious Leaves 5x8 stencil. I then sponged Violet Shade PanPastels through the Dotted Flowers 5x8 stencil & Black PanPastels through the Number Jumble 5x8 stencil. Other PanPastel colour used is Permanent Red.


Again Permanent Red PanPastels sponged through the Dotted Flowers stencil and then highlighted with a Black Pitt Pen. I have also used a white Gelly Roll pen to highlight certain areas of the Dylusions Stamps (Doodle Parts & Say What You Mean).

I will be back on Friday with my final project of this month incorporating PanPastels. TFL x

Monday, 7 May 2012

Snazzy DT Project Featuring PanPastels ....

Good morning everyone, Gillian here with the 1st of our May projects featuring PanPastels. If you haven't worked with PanPastels before here is a little introductory to them .... 

"PanPastels are a professional grade soft pastel colours packed into a unique pan format, so they can be mixed and applied like paint. All 80 Panpastel colours are made using a unique manufacturing process requiring minimal binders and fillers, resulting in rich, ultra soft and low dust formulations".

To see how versatile and easy they are to use, click HERE and you can watch the following videos.

All 80 PanPastels Colours are divided into the following - 20 Pure Tones (which all end with the number 5), 20 Tints, 20 Shades, 20 Extra Dark Shade. PanPastels also have their own "Tools & Applicators" - click HERE to see the full range which are all available at Snazzy's. 

For my 1st project I started out by applying Yellow Ochre to the Large Creative Covers Art Part set, I then used Versamark using the following stamps from the Studio 490 range - It's More Flower Art, The Essence Of Art & Mechanical Art. 

This wooden flourish is from Kaisercraft, I applied Red Oxide Shade PanPastel then dipped it several times into UTEE, heating & reapplying inbetween layers.

I used Yellow Ochre & Turquoise Shade for the inside of the Journal, again using Versamark to stamp the background image from the "It's More Flower Art Set".

 I used Titanium White & Red Oxide Shade to colour this gent who is from the "Guys,Gals & Phones Art Part Set". The co-ordinating stamp is from "Call It Art"
On the back, again I have created multiple layers using the above PanPastel colours. The flourishes are from the "Corners & Flourishes Art Part Set"

 Be sure to drop by and leave a comment as one lucky person will be chosen by Random.Org at the end of the month winning a set of three PanPastel colours of their choice.

Now onto the winner of our "Spring Challenge" .... Random.Org has chosen

#2 which corresponds to Sarah .... please email me to claim your prize. A big thank you to everyone who entered our challenge.

Our Top Three favourites are in no particular order .... Julia, Judith & Paula .... Ladies please feel free to display our Top 3 Winners Blinkie on your blogs which can be found at the top left of the DT blog.

I will be back later in the week with some more projects featuring PanPastels.

Monday, 30 April 2012

Snazzy Challenge .... "Spring Colours"

Good morning everyone .... today at Snazzy's we are having a challenge. The theme for this challenge is "Spring Colours". We would love to have you join in, interpret the theme as you wish. As always one lucky entry chosen will win some goodies, the prize this month is from Echo Park (Spring Collection) along with some small co-ordinating Ink Pads. To join in with the challenge, please link your own blog post to the challenge post itself. The winner will be announced on May 7th.

The winner of April's candy is .... Craftychris and was chosen by Random.org .... please email me with your details to claim your prize.


The Design Team have made some samples to inspire you ....


Good luck everyone, the Design Team can't wait to see what you make.


Wednesday, 25 April 2012

Design Team project #2 by Astrid featuring Prima Almanac Collection

Hello again dear Snazzy visitors. Here is my second project for this month. It's also the last one featuring this collection so for a chance to win the stamps and embellishments, don't forget to leave a comment of the first post of this month by clicking on the picture in the sidebar on the right.

This is a little card holder, always comes in handy. You can find a great tutorial with video on how to make this on Splitcoast Stampers. Just click this link: http://www.splitcoaststampers.com/resources/tutorials/accordionstylecardholder/ (Sorry I am using google chrome and it won't let me make links clickable so you may just have to copy and paste lol if you want to look)
Anyway, here is my version, quite different, hope you like it. I think the pictures pretty much speak for themselves so I won't bore you with a long description. 

Front of holder. All the pretty buttons come with the collection!

Inside with tabs for different types of cards

Side view

Detail. The pretty letters come with the collection! You just have to cut them out.
If you are looking for a fun project for yourself or to give as a gift, give it a try. These papers are just perfect for it I think.

Well, that's it for now, don't forget to come back on Monday when we are having a challenge with the theme "Spring Colours" and another chance to win a fab prize!

Monday, 23 April 2012

Design Team project #1 featuring Prima Almanac Collection

Good morning all you lovely Snazzy visitors, Astrid here with my first project this month featuring the wonderful Almanac collection by Prima. I think this must be one of my all time favourite collections, so versatile as you probably have seen already from all the great projects my teamies have show cased so far. If you haven't done so already, make sure you click the link on the right here and leave a comment on that post for a chance to win the stamps and embellishments that come with this collection, they're awesome!!
So onto my project, I decided to make a mini out of envelopes, a great idea passed onto me by our wonderful boss Val. Here is the cover:
cover
To make the mini is so simple, all you do is take about 6 equally sized envelopes, on 5 of them you fold the flaps back and slot them into each other. On the last one you make a score about 1 cm wide where the flap attaches to the rest of the envelope and fold it round the others, you cover it with your chosen papers both inside and out and voila, your basic mini is done and you can start the fun of decorating it.

For my cover I used one of the papers (obviously), and played around with it, I used Distress Inks in Pumice Stone, Vintage Photo, Tattered Rose and Victorian Velvet. I used these colours right through the mini, For the cover I also used a Prima stencil from my stash, some die cuts, and several of the wonderful charms and buttons that come with the collection. For the rose you see, I used one of my favourite techniques to alter the papers a bit, namely decoupaging one of the layers of a paper serviette with Mod Podge. Her are some details:
For this label I used one of the stamps. The title is computer decorated, then I stamped over it and carefully cut it out.
Both the butterfly (cut from one of the papers) and the cherish charm are part of the collection
For the inside pages I did not have quite enough papers as I also wanted to make a second project. So for some of the pages I used some Kaisercraft papers from my stash. By applying the same techniques to them, they tie in pretty well with the Prima collection though I think. Instead of showing you endless photos (and descriptions) of these pages and the tags etc, here is a little video that shows them:

All of the tags are made with the elements from this collection, they are just ideal for a mini I think. This one is going to hold photos of my first grandchild that is on the way...:o)

Well, that's it for now, I will be back on Wednesday with another little project that uses the collection in its unaltered state. If you want a chance to win those goodies, don't forget to leave a comment by clicking the side bar icon!

Friday, 20 April 2012

DT Project #3 by Minxy : Featuring:

Prima Almanac Collection

So my snazzy folks here I am with my final offering of the month {well apart for the challenge that's coming up at the end of the month} And this time I focused on the stamp set {which you can win by leaving a comment HERE}
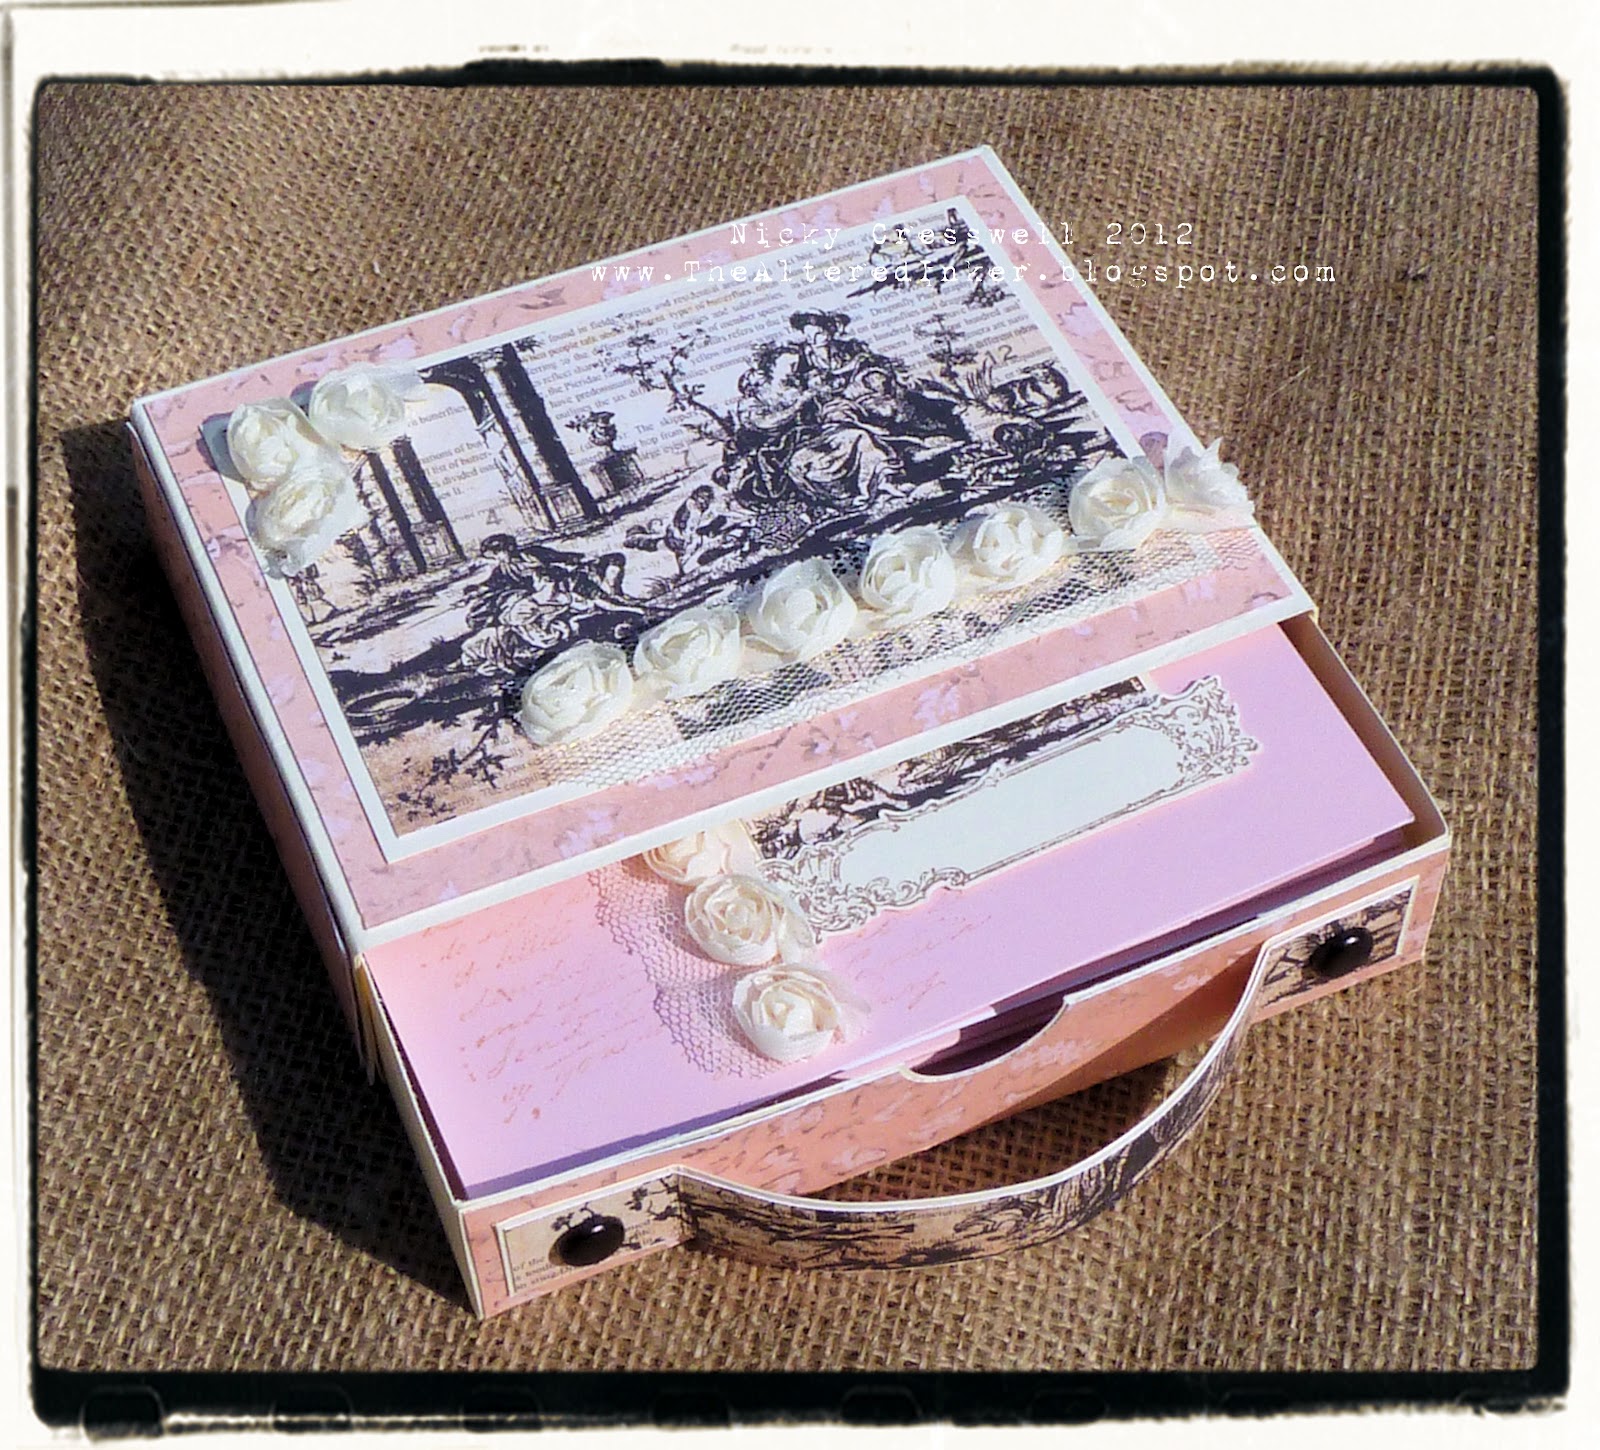
 I made a box draw with the help of an online tutorial, but it wasn't quite the size I needed so I altered it to suit my needs. I decorated it with the Prima papers, and bit of the idea-ology rose ribbon.
 Then I made a matching set of cards with prima papers, and the cling mounted prima stamps. I stamped the script direct on the cards and then layered some of the pretty images that were from one of the papers. I stamped and cut out the scroll and finished with some rose ribbon. There are 2 each of 3 designs.
I didn't bother to stamp any sentiments in the blank scroll spaces as I figured these would make good go to cards, then you can add a good luck or happy birthday as and when needed.
So that's me for now, Thanks to everyone who has stopped by and commented, I truly appreciate your support. Make sure you hop back soon as Astrid will be sharing her lovely Prima projects.
Till then..
Stay Inky