Monday, 22 August 2011

DT Project #4 ....Note-card holder

Hello everyone, this is Astrid here and I am very excited to bring you my first project as DT member for Snazzys.

I am going to show you how you can create a little note-card holder that would make a wonderful gift for any friend that is not a card maker, although even someone who is a card maker might enjoy receiving something like this. The holder will hold up to four 9cm x 9cm (3.75 x 3.75 “) double note-cards. Obviously you can make both the holder and the note-cards in whatever style you wish, I am going to show you two, one more masculine and one more feminine. All materials I used are available from Snazzys

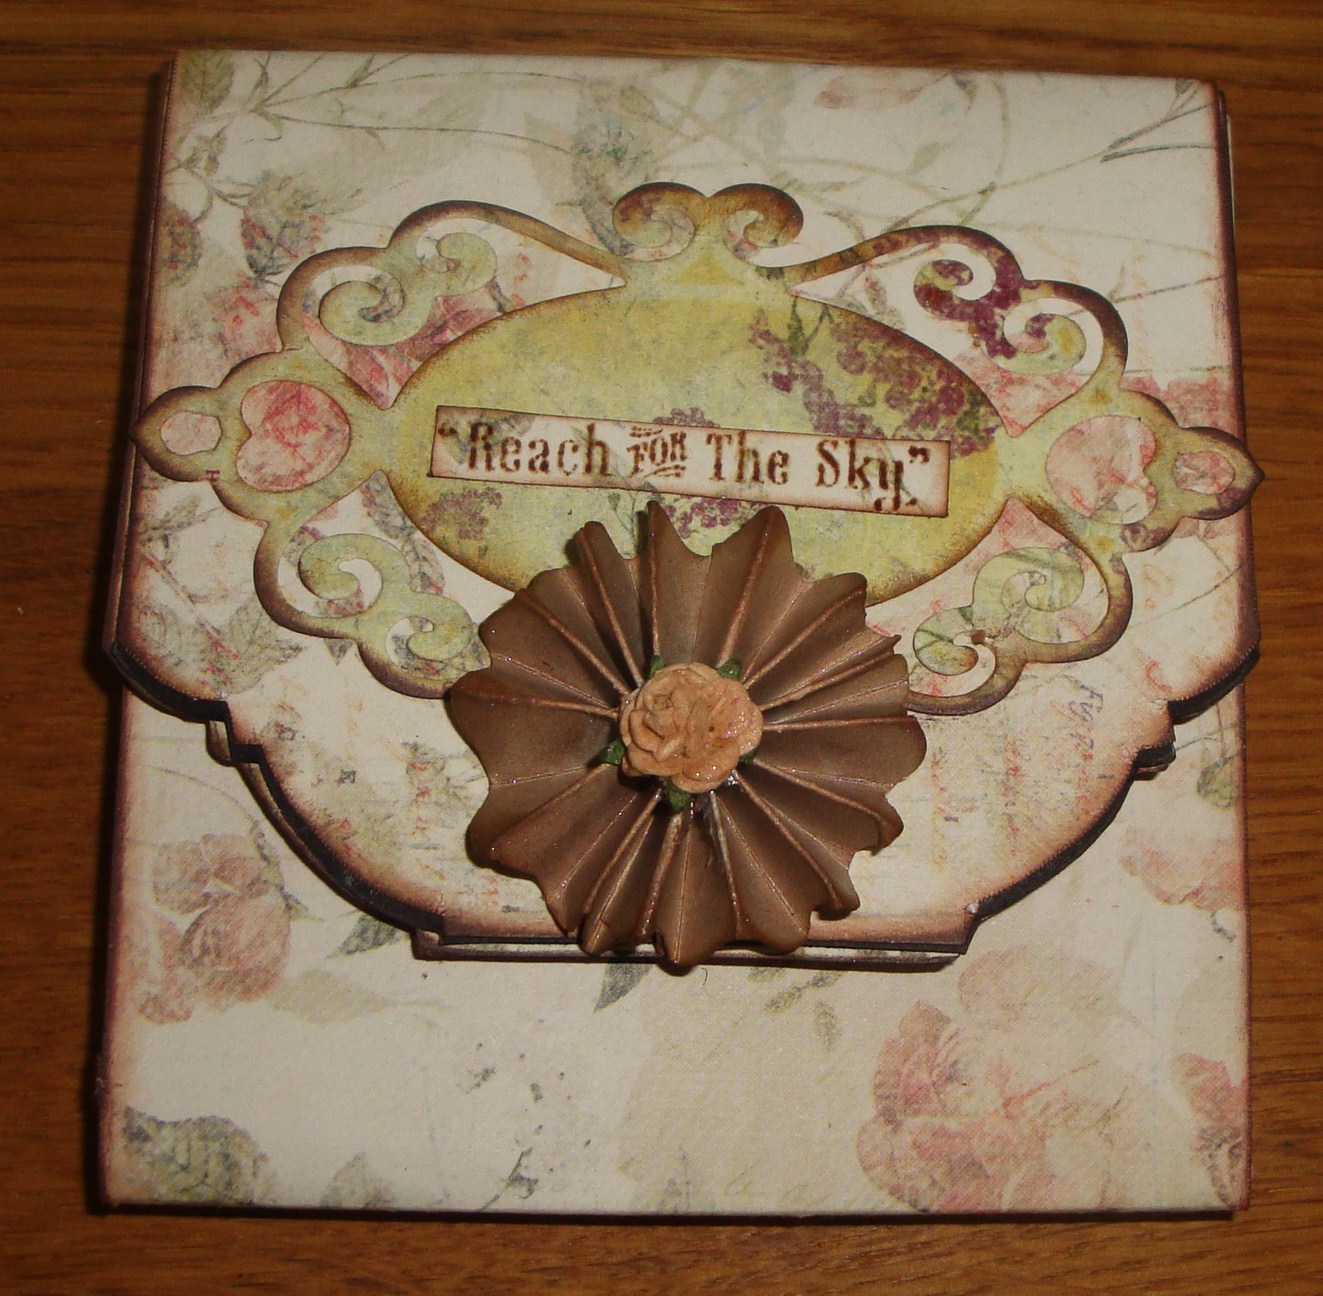
Here are two examples of both the holder and some note-cards to go inside.

First the little folders:


And now for some note card examples:


This is what you will need:
For the note-card holder:
1 piece of strong A4 card any colour
2 sheets of 12 x 12 scrapbook paper (I used 7 Gypsies Lille papers for my masculine cards and holder and Prima Botanicals for my feminine cards and holder)

For the note-cards:
For each card you will need:
One piece of card 18 cm x 9 cm ( 7” x 3.5”) scored and folded in half (for my masculine ones I used black, for my feminine ones, cream)
One piece of strong coloured paper 8.5 cm x 8.5 cm (3.25 “ x 3.25 “) (I used dark red and pale green)
One piece of scrapbook paper 8 cm x 8 cm (just over 3” x 3”). I used the Lille and Botanical papers again, - great to use up scraps.
A selection of stamps ( I used Darkroom Door Steampunk DDRS068, Chorus DDRS012 and also some Tim Holtz and 7 Gypsies, all available from Snazzys) I also used some freebies from craft magazines.

In addition you will need
Ruler
Craft knife
Your favourite glue (I used a basic glue stick, some PVA adhesive and a Stix2 permanent glue roller and my ATG)
A selection of embellishments of your choice

Here is the template for the holder:


Method:
1. Print out the template full size onto A4 paper and cut out
2. Glue your chosen paper onto your strong A4 card, let dry
3. Trace the template onto your card and cut out
4. Score and fold along the fold lines, fold all the flaps towards the centre of the holder and open out again
5. If you want to enhance the cover with stamps, now is the time to do so, this is also the time to cover the inside of the top flap with more paper if you want
6. Fold the two sides towards the centre, then fold up the bottom flap and carefully glue it all in place
7. To close your folder you can use a large brad, Velcro dots or whatever closure you can come up with
8. Create you note-cards, put them in the holder and your little gift is finished

Well, I hope you will give this a try, above all have loads of fun, use your creativity and imagination!

Friday, 19 August 2011

DT Project #3 (Part 3)


Can you tell I really love these new 7Gypsies 'Lille' papers,stamp and tags - Well, here's my last offering using these gorgeous items.
For this card, the base paper is the reverse of the 'Beautiful' sheet - which Ive randomly rubbed over with some blue Distress Ink.
Ive stamped the words 'Beautiful' and 'Life is Good' (only used the 'Life' part) on a blue coloured strip of paper, again from the 'Beautiful' sheet
The bird image is from the 'Beautiful' paper, which Ive cut out and layered with another section from the 'Beautiful' paper (music score).
The printed numbers are from the 7Gypsies 'Lille' tags and so is the red tag hole on the top of the bird image,Ive coloured the ribbon with red distress stain.
Finally, Ive spritzed a mix of Brushed Corduroy re-inker and water.

The one thing I would say is, don't be scared to cut these papers up - yes, they are wonderful as they are but you can create something a bit more unique if you dare to take your scissors to them.....go on,I dare you!

Wednesday, 17 August 2011

DT Project #3 (Part 2)


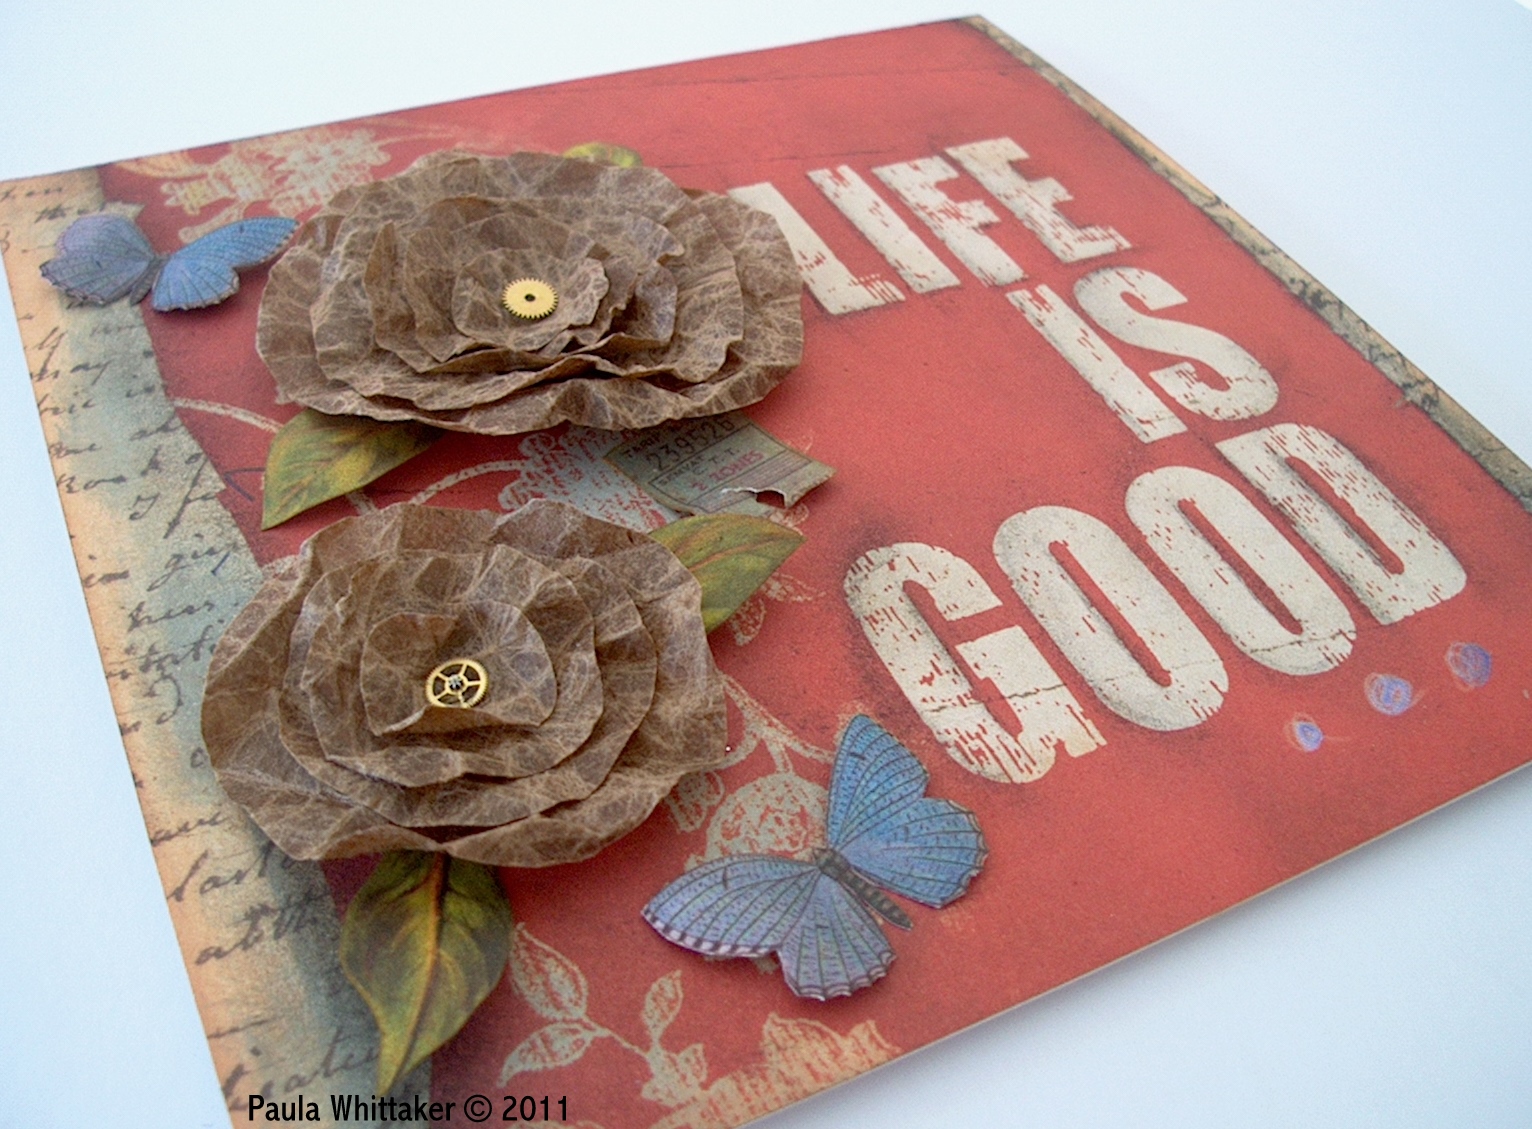
I happen to have the same idea as Lesley, as Ive also covered my card with the wording from the 7Gypsies 'Lille' collection paper ,my choice was the aptly titled 'Life is Good' - Ive rubbed blue distress ink along the edges of the red printed panel to give it a little bit of depth, Ive also rubbed charcoal around the wording, again, to give it a bit more depth and dimension.
The flowers are made using Tim Holtz Glassine Kraft paper - Ive just freehand cut out 4 decreasing in size circles, then scrunched them up - which gives them a great worn effect. You then simply layer them and Ive added small watch cogs to the flower centres.
The leaves and Butterflies have been cut from a paper which is from the 7Gypsies 'Conservatory Collection'.

Monday, 15 August 2011

DT Project #3

Well, here goes...my first project for Snazzy's.....be gentle with me!


When I first saw the 7 Gypsies 'Lille' Collection of papers, this one really stood out for me - I'm not a scrapbooker but this really felt like a good 12x12 paper to make a simple page but without looking too simple....do you know what I mean? If you don't, no worries lol I also had this 12x12 box frame sitting in my craft room, think Ive had it for 4 years or more - you can still buy them from 'The Range'. It was a plain wood frame but I've given it one of my painted treatments (which will be explained in the future).
Anyhow, I took the 'Life is Good' sheet and spritzed some red distress stain across the page, not sure if it shows up in the pics or not - I then took some Weathered Wood Distress ink, and rubbed it here there to give some of the printed images depth.
Ive added a 7Gypsies 'Lille' tag but I cut the end off and used it further up the page on the left hand side. (black with a printed number on it).
The name is Grungeboard letters which have simply been painted in black.
The butterflies and moths have been cut out of a piece of paper from the 7Gypsies 'Conservatory Collection'.
Ive also added a Tim Holtz clock face and spinner and a piece of ribbon coloured with distress inks.

I really wish I could show you the photo, which happens to be my nephew Jake but my brother/Jake's Dad wasn't to keen,which I do understand - I realise I'm biased but he's a real cutie,well, you'll just have to believe me on that one!

Monday, 8 August 2011

DT Project #2

Good Morning All,

It's my turn to show you my first proper DT project. I decided to make a card that incorporates a couple of tags using some fabulous 7 Gypsies Lille papers and stamps.

Here is the card with the tags in the pockets I made on the front.

and here it is without the tags.


I cut the sheet of 7 Gypsies Lille paper to position the word 'beautiful' exactly where I wanted it and distressed the edges with a TH distressing tool and ink. I cut the two slots for the tags where I wanted them and then adhered the paper to a co-ordinating piece of card, which I also distressed, leaving the middle unattached so the tags would slot in. Before affixing these to my base card I blended Paris Trunk Indian Sapphire ink and PaperSoft Apricot round the edges of the base card dabbing through sequin waste in some areas.


To make the flowers I adhered some of the paper to molding plastic and then die cut it with TH Tattered Florals die. I inked the edges of the petals with Shabby Shutters Distress Ink before molding them with the heat gun and then layered them and added some beads before gluing them to my card together with some sari silk ribbon.

Next came the tags.


I'm not going to go into detail over how I did each tag in case I bore you rigid, lol, but if anyone has any questions please ask away in the comments and I'll be happy to tell you what I did (if I can remember, ha! ha!). Basically, I did lots of blending of inks, tearing of papers, overstamping with a mixture of the 7 Gypsies Lille stamps and some of Mr Holtz', clear embossing, spritzing with Cosmic Shimmer Mica Spray and rubbing with Inca Gold. In other words, I had a lot of fun!


These are all wonderful products to work with so if you are wanting to add any of them to your craftroom stash just give Snazzys a ring.

Thanks for visiting.

Hugs
Lesley Xx

Wednesday, 3 August 2011

Design Team Project #1 (Part Two)


Good Morning ... Gillian here back with my extra bonus project using the 7Gypsies DT project kit.

I started out by covering this 7x5 canvas board using a selection of the 7Gypsies Lille paper collection and distressing areas with Distress Inks (Vintage Photo). The Tando Chipboard shades were inked with Vintage Photo & Versafine (Crimson Red). Adventure, Life is Good, Music and Bird images are all from the 7Gypsies Clear Stamps Set inked using Versafine (Onyx Black). All of the above are available from Snazzy's by calling 01793 60 24 70.

That's it from me for now, don't forget to check back next Monday when Lesley will be sharing her 7Gypsies DT project.

Monday, 1 August 2011

Design Team Project #1


Good morning everyone ... Gillian here with my 1st DT project for Snazzy's. My project kit contained the following items which are available from Snazzy's.

7Gypsies Lille 12x12 Papers
7Gypsies Lille Clear Stamps
7Gypsies Lille Tags
Ranger Distress Stains (Vintage Photo & Weathered Wood)
Versafine Crimson Red
Tando Creative Chipboards (Mixed)

I started out by painting the smallest of the Configuration boxes including inserts with Adirondack Paint Dabber (Expresso). Using the 7Gypsies (Lille) papers I tore various areas of the paper and adhered to the side and top of the box using Matte Medium, then distressing with Distress Ink (Vintage Photo). I then stamped 7Gypsies (Lille) clear stamps in Versafine (Crimson Red) onto the 7Gypsies (Lille) tag and distressed with Vintage Photo. The inserts top left, top right, bottom left & bottom right also have 7Gypsies (Lille) paper within. I then covered the small Tando Chipboard squares with Lille papers and edged with Vintage Photo attaching a Philosophy Tag on one & a piece of IdeaologyTape on the other . I then stamped (7Gypsies Lille Stamps) onto said papers and adhered to the Ideaology Cork Vial (again using Matte Medium) and distressing with Vintage Photo. In the centre of the box I have torn a piece of 7Gypsies Lille papers and adhered to the Ideaology Film Strip using Matte Medium. I then highlighted various areas of the Configuration Box with Metallic Rub on Wax. Various Ideaology embellishments have been used to decorate the box.

I will be back on Wednesday with an extra bonus DT project using the above supplies. I hope to see you then. A big thank you to all our new followers who have joined us since the DT launched, it's great to see some new and familiar faces alike.