Showing posts with label Idea-ology. Show all posts

Monday, 18 March 2013

DT Project #1 Feat Sunrise/Sunset By Anna Dabrowska For Prima

Good morning everyone .... Gillian here with my first project for this month using the GORGEOUS Sunrise/Sunset Collection by Anna Dawbrowska for Prima. This month the design team have been given the A4 Paper Pad, Finnabair's Mixed Media Journal and an assortment of stamps (Cling 1,2,3 & 4). from the collection.

This months Random Comment Winner is .......

No 15 .... Ria Gall! Congratulations please email Snazzy's to collect your prize. 


My 1st project is a 5x7 canvas board which I have covered with paper (X-Radient) from the A4 Paper Pad. I've then used Distress Ink (Walnut Stain & Wild Honey) through Anna's new 6x6 stencils (Checker & Doily).


The "little girl" image is from a previous Somerset Studio issue. The words "Laughter of the Soul" is from the Ideaology Chit Chat Sticker book. The Grungeboard Crown has been coloured with Treasure Gold (Spanish Topaz & Onyxite). I've then highlighted the "inked" circles using the Sunrise/Sunset Clear Epoxy Stickers.


{Cling Clear Stamp1 - Doily Stamp}

Next I painted the Sunrise/Sunset Wooden Icon Borders with Wild Honey Distress Paint and edged using Walnut Stain Distress Ink.

{Cling Clear Stamp 4 - Mini Flower Stamp}
 
These paper flowers have been spritzed with Dylusion Sprays (Black Marble, Pure Sunshine & Dark Chocolate). The wooden leaves were painted with Distress Paints (Bundled Sage & Mowed Lawn) then lightly spritzed with Dark Chocolate again. I've then added some Ideaology embellishments. 

 
Between the grey/dull weather and my phone camera, the pics are not ideal, but hope you get the jist of things.

To be in with a chance of winning the A4 Sunrise/Sunset Paper Pad simply leave a comment HERE on the first post of the month. I will be back on Thursday with another Sunrise/Sunset make ... until then!


Wednesday, 13 March 2013

Find Delight - DT Project by Hels

Gooodly Morning Snazzyfans!  I am back again with another taggy offering using the gorgeous Prima Engraver Collection that we DT girlies have been using this past month.  Before I waffle on, please do remember that Snazzy's very kindly offer a discount on the DT Kit that we are using... so  you can grab yourself the same kit we have used... and get a bargain into... erm... the bargain!  HERE are all the deets how to snaffle one for yourself :O))


Another tag from me, this time a smaller one.  This is a normal size 8 manila tag from Ranger.  I used Distress Inks to colour the tag:  starting with Antique Linen, I blended over the entire tag and then added Frayed Burlap DI around the edges.  Around the very edgy bits I added Brushed Corduroy DI - this colour tones perfectly with the Engraver collection.  Next I did a bit of stamping for the background using the Engraver stamps and Ochre Archival Ink.  I added a smidge more interest using a clock stencil and Frayed Burlap DI.


Next I used some of the offcuts of paper from my previous project and made a little banner piece... adding stickyback metallic pearls for a bit of bling and then sticking it directly to the tag base.  I had a Grungepaper diecut hinge kicking about on my desk, so I coloured that with Brushed Corduroy and Walnut Stain DI and popped that onto the bottom of the tag.  The flowers in the kit are to die for so I had to use those aswell... spritzing them with Black Marble Dylusions and Cosmic Shimmer Ancient Copper to add a bit of sparkle.   The sentiment was made up using Idea-ology Chit Chat Stickers and popped onto 3d foam to make the sentiment pop a little more.  In the kit are some little pearly swirls so I stuck those on after adding a smidge of gilding wax to them to tone them in... how pretty!


Anyways, that's all from me for now... don't forget you could be in with a chance of winning the fabby DT Kit that we have been using too... simply leave a comment on this post HERE.   Thanks for looking... TTFN!


Monday, 11 March 2013

Memories - DT Project by Hels

Goodly Morning Snazzyfans and a very happy Monday to you all!  If you have been following the blog this past month you will have seen some gorgeous creations from my teamies using the fabby Prima Engraver Collection of papers, stamps and flowers.  CLICK HERE to see the collection we have been working with and also... remember you can grab yourself a goodly bargain because our DT kit is for sale at a bargain price too :O))  


My first offering this month is a mahoosive Size 12 tag from Ranger.  The tag base is manila in colour and to make it match with the colour theme of the Engraver papers, I used Vintage Photo and Walnut Stain DI's to blend around the edges.   I cut the tag into two pieces so I could then attach it back together with eyelets and a bit of hemp.  I cut some of the papers (they are so gorgeous... almost too difficult to cut them lol) to fit onto the tag in layers... making a focal point on the bottom half of the tag with the clockface.  I added a Tim Holtz Fragment to the centre of the clock to make it pop more.


The cut papers were all edged with Walnut Stain DI and I scruffed up the edges to make it a little more shabby looking.  I added a couple of pieces of the ruler papers so the top bit of the tag as an arty addition.


The sentiment was stamped onto an offcut of paper using Jet Black Archival Ink and then edged with Vintage Photo to make it blend in nicely.   One of the papers has some fabby circle designs on it... and it just so happened that I had three more Fragments that fitted over the circles perfectly... so they were glued on with Glossy Accents and when cut out, edged with more Vintage Photo just so there weren't any white cut bits showing.


The embellishing was fun indeedily... the flowers in the Engraver collection are stunning... the larger ones have a broken glass style of glitter attached to the petals, once I had given them a good spritz with Black Marble Dylusions and Ancient Copper Cosmic Shimmer they really came to life.


The butterflies are also from the stamp set... stamped onto the papers again, using Black Archival and Walnut Stain DI to edge them around to make them match in... and I added some metal spinners to the middles for bodies.

Don't forget that you can still win this fabby collection - just CLICK HERE for the details... easy peasy!   Please do scroll back to see the other beautiful creations that the team have made with this fabby collection...


Thanks for looking... have a fabby day!


Friday, 8 February 2013

DT Project - Art Life - By Hels

Goooodly Morning Snazzyfans!  Apologies for the late start, Mr Internet decided to take a long break last night so I couldn't post at the usual time!  Anyways, better late than never I always say so here we are with the last DT post using the MDF Man's Cogs that we have all been working with this past month.  Speaking of which - if you scroll back through all the recent posts, you can see the adorable art that the other girlies on the team have created.  Also, if you click HERE you will be magically transported to the Snazzy's online store... and... if you click HERE you will be whizzed away to the first post of the month where you can leave a comment and be in with a chance of a spot prize! 


So, a few days ago you saw the faux clock I made... and being as I lurves my flowers, I decided to go down the same route with this creation, only this time I used all Studio 490 flowers and leaves - did you know Snazzy's has an amazing collection of Studio 490?  No?  Click HERE to see it all in its glory!   I started out by painting the base cogs with Mushroom paint, I applied it all over with a brush and then once dried, I used the same brush (now quite dry) to add a bit of texture with sweeping strokes across the cogs.


Next I applied Vintage Photo DI around the edges of the cogs - because the Mushroom paint is acrylic, it has a bit of a chalkiness to it... which meant the Distress Ink was lovely and muted, just the ticket!   Next I used some Studio 490 Stencils for Art and applied Tumbled Glass DI over the diamond pattern... a quick zap with a heat tool to set the ink and then applied Iced Spruce DI over the long liney pattern stencil, ensuring I didn't cover the entire cog face.  Once these had been dried off, I used Cosmic Shimmer Glue to stick the Cogs together so when this piece was finished it became a wall hanging.


Now to the happy place of stamping out some Studio 490 flowers and leaves onto pretty patterned papers.  I could have used Grungepaper but I wanted to keep the light pretty feel of the piece so double sided papers were perfect.   Once stamped, in Coffee Archival for the flowers and Olive Archival for the leaves, I cut them all out.  Next came the tidying up bit, were I edged all the flowers with Tumbled Glass DI - this gets rid of any nasty white cut bits... and Forest Moss DI for the leaves.


Finally, I assembled them onto the cogs and added some butterflies and my fave bits... Embellish Your Art, the ickle resin delights from the Studio 490 range.  The letters making the words are Idea-ology Alpha Parts that I jazzed up a bit with some gilding wax.    And there you have it.  A pretty was to use a quite masculine object.   Do pop back on Monday BTW because Gillian will be here with the brand new DT kit we are playing with next month... ohhhlalalaaa.. are you in for a treat!   Thanks for looking... have a great day!  TTFN


Monday, 7 January 2013

DT Project #1 .... It's All About The MDF Man!

Good morning everyone it's great to be back after our festive break .... the design team are raring to go again with this months kit (will certainly get the cogs ticking that's for sure).

This month the DT will be working with the following shapes courtsey of The MDF Man - so we have a free reign this month in terms of creativity. Look forward to seeing the design team members interpretation.


For me their was only one way to go with this .... out & out grunge (sorry folks if that is not your thing).


I started out by using Distress Ink (Antique Linen) on all the cogs, after adding a couple of layers I then inked the edges with Distress Ink (Walnut Stain). The largest of the cogs was then stamped using Tim Holtz/Stampers Anonymous Classics #6 in Archival Ink (Sepia). I then applied a second layer of stamping using the "text" stamp from Tim Holtz World Traveller Stamp Set, this time using Archival Ink (Jet Black).

 The small cog at the top was stamped using the large background from Tim Holtz Remnants stamp Set.
I stamped the "face" image (from Tim Holtz/Stampers Anonymous Classics #5) onto cardstock and cut to size, the quote is from Tim Holtz World Traveller Stamp Set ....
.... which was cut up into small bits rather than keeping it as one long sentence.

 
I've used Tim Holtz Ideaology to decorate - Hitch Fasteners, Clock Face & Game Spinner which were coloured using Metallic Distress Stain (Antique Bronze), I've also used an Ideaology key.

I hope you have enjoyed this project, it sure was fun to do .... don't forget to leave a comment here to be in with a chance of winning the random comment prize drawn after Hels week. 
 
TFL x

Monday, 24 December 2012

Santa Claus Is Coming To Town...By Hels Sheridan

Goodly Morning Snazzyfans and a very Happy Christmas to you all.  Today I am here with my DT offering featuring the gorgeous Carta Bella Christmas Day Collection papers - oooh lalalalaaa, Carta Bella always do the most fabulous designs and these papers are simply beautiful.  The colour palette appeals to me - it is a vintage red, green, cream and brown toned collection, absolutely perfect for all your Christmas projects - do scroll back through the month because the DT have made some totally amazing arty pieces using the papers.


I am in a bit of a Paper Blocking mood at the moment and each year I make something festive to pop onto the wall... so this year I decided to alter a canvas, using the Paper Blocking technique - which really is simple, use up all your little off-cuts by simply layering them onto a board or canvas, smudge over some watered down creamy coloured paint, in my case I used Traditional Tan paint, using Cut & Dry foam... once this is dry, use either Multi Medium or Glue & Seal to give the whole piece a waterproof seal and then use either charcoal, black paint or a Stabilo All pencil and smudge along the overlapped bits to add some definition.  I added on one of the stickers from the paper collection, I bobbed him onto some card, cut it out, glued it to the canvas and then edged around him so he pops from the design.  The finishing touch was the addition of the Christmas Muse Token... I love these little charms because they are so versatile and the word fits perfectly with my theme.


As ever, Snazzy's are doing a special offer on the DT Collection, you can find the details HERE on the website.  Also, if you click HERE you can leave a comment and be in with a chance of winning one of the DT kits.  Thanks for looking... I wish you all a very Happy Christmas and hope that all your wishes come true!  TTFN


Friday, 23 November 2012

The Rosey Tag of Christmas

Gooooodly Morning Snazzyfans... cor blimey, my internet is soooo slow, I have just spent a yonk and a half trying to get my page to load.. finally!  Well, I shall be a smidge later posting this than anticipated but better late than never!  So, I am back again with another offering that I made using the (saying this loudly) Teresa Collins Christmas Cottage Collection papers that we DT have been lucky enough to be playing with this week.  How can I describe the papers?  Do you remember the old Crate Papers of years ago? Textured so they have a linen-y/canvassy feel to them? Well, these are just like that, very reminiscent of them. The designs are marvellous - not too old fashioned but with enough of a vintage feel that they aren't ultra modern and in-your-face (I don't do ultra modern lol) The quality is amazing; they are a very strong paper, more like a cardstock in actual fact.  The Collection comes with a sheet of die-cuts too, one of them I have used on this tag - and they all match perfectly with the double sided designs.  And... did you know... you can CLICK HERE to be transported off to the Snazzy Online Store where lovely Val and Don have put a discounted special offer on our DT kits for this month.  As well as the papers we have had some stamps to use (I haven't inked mine yet!) and... some goooorgeous brads to match too (I loves my brads!)  Anyways, enough waffle, on with the tag:


The tag is a Size 8 cut from plain cardstock and then covered with two of the patterned papers.  I made a little border thingy to cover up the join in the papers and added a brad from the pack - check it out... not only is it big (bout the size of a 5p) it is also designed and has an epoxy covering so it is glossy and raised!  Cool huh! Once I had done this, I edged all around the tag with Frayed Burlap Distress Ink and then took my paper distresser and scuffed up the edges to make it a little shabbier. 


Next came some bling in the form of a very light wafting of Rock Candy Dry Stickles - I used Glue & Seal to paint onto the top and bottom of the tag and then sprinkled liberally with the Dry Stickles... I LOVE this stuff.. it is like crushed sugar, not a smidge of AB anywhere so the light just sparkles instead of colouring.  You can see the bling in one of the photo's.   I did a wee bit of die-cutting with the papers - you can see how strong they are, they withstood a Vagabond-ing and then a sanding too!  I added Rock Candy Dry Stickles to the number 25 - again using Glue & Seal for the sticky bit.


After all that die-cutting I got all creative (!) and made myself a rose.  I love making these big fancy roses - they are soooo simples too - if you check out my own bloggy there's a link in the side bar to a Tut I did some time ago... a simple way to make pretty roses.   I added some wire twists and a couple of Alcohol Inked bells to the rose embellishment and then finally, one of the pop-outs from the die-cut page of the collection, edged with Frayed Burlap and distressed with the paper distresser and then popped into a Memo Pin.  I added a few bits of Idea-ology to the top of the tag with some ribbon and voila, finished!


If you haven't already... CHECK THIS OUT... you can leave a comment and be in with a chance of winning some fabby candy... all you need to do is leave a comment!    That's all from me for now... thanks for looking... have a great day!  TTFN


Friday, 19 October 2012

Hallowe'en Part 2 By Hels

Goooooodly Morning Snazzyfans, tis I, Hels, back again with my other Hallowe'en project for this month.  I have concentrated on the Hallowe'en Blueprint stamps for this project because the other one was mostly about the Carta Bella All Hallow's Eve papers.  Did you know that you can buy the DT kits we get sent (not the actual kits we have because they wouldn't be full... I shall shut up now)  HERE are all the deets on how to get your inky mits on them... and if you buy them together there be a discount to be had too!  Oh and while I think on, did you know the Snazzy website is getting fuller so do pop over to see what goodies are there... and it is being added to regularly too!  HERE is a linky for that one.


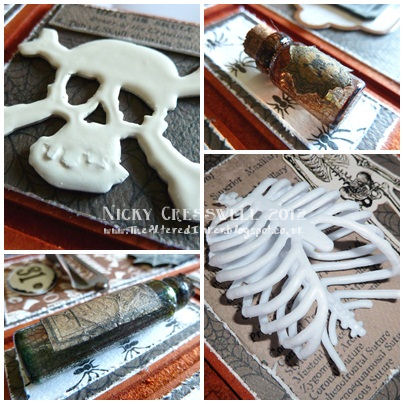
So, being as I am in a spooky kind of mood, I decided to stick with the 3D decoration thing that I have going on at the moment.  The base is a wooden shadowbox which is approx 8" square so you have an idea on the sizing of my project.  The base was given a quick coat of Eggplant Dabber and then I used some Crackle Medium and bobbed a coat of Pitch Black Dabber over the top.  My Crackle stuff is ancient so the crackles are a bit disappointing, so I grabbed a scratchy tool and scrubbed a bit... well, it is sort of crackled.   The insert is some Tim Holtz Paper and I dripped some Red Pepper and Pitch Black Alcohol Ink down inside it so it looked a bit more spooky, like spiders blood or something.


I filled up some Corked Vials with more of the Alcohol Ink and made some little labels using Tim stamps... adding a smidge of Alcohol Ink to the labels and corks to make the bottles look well used.  I wanted to add some kind of spider web to the frame but was puzzling over what to stamp it with... when all of a sudden, like a bolt of the proverbial, I hit on the idea of stamping with Ranger's Glue & Seal and then sprinkling the new Rock Candy Dry Stickles over the top... it worked! I am chuffed about that!


The Bats are stamped onto Grungepaper, coloured with Pumice Stone and Black Soot Distress Ink and then curled to make them look like they are flapping about.  The Skull and Tombstone are both stamped onto white card and cut out. The Skull has a smidge of Black Soot DI to make him a bit less standy=outy and the Tombstone has been snipped down the side and folded so it looks a bit more 3D.  I coloured this with Pumice Stone and Black Soot DI.   Kitty is a little cutie isn't he?  He has been stamped twice, I layered up his head and back legs, adding a couple of brads so he is a bit mobile and then 3D'd him onto the frame.  Finally, another couple of spiders.  The first one is cut from Clearly for Art Blackout using an Alterations die and heated to curl the legs a bit.  The other one is from my pack of Hallowe'en critters from the £1 shop.


And there you have it.  I have been trying to think of ways to get some kind of lantern light into the box but struck a big fat blank... if I was handy with a drill I might have drilled holes and added fairy lights just poking through but I am rubbish with anything that may cause skin to be cut lol  OOoooh and whilst I think on, you still have a couple of days to enter this months giveaway... all the deets are HERE for that.  Thanks for looking... Happy Haunting!  TTFN


^0v0^ ^0v0^ ^0v0^ ^0v0^ ^0v0^ ^0v0^ ^0v0^ ^0v0^ ^0v0^ ^0v0^ ^0v0^ ^0v0^ ^0v0^

Thursday, 4 October 2012

DT Project #2 by Minxy, Featuring:


***
Hay Snazzy Folks
It's me again with another spooktastic project.
This time i've made a display assemblage using one of the very cool MDF blanks that Snazzy's sell.


I coloured the whole board with rusty hinge distress stain.
I then cut the various lush carta bella papers just smaller than the panels on the board.
In some cases I also used some of the strips from the front packing sheet.
I stamped a couple of the blueprint stamps onto black shrink plastic with white adirondack paint dabber, and used as embellishments.


I grunged up some mini bottles with rock candy distress crackle and alcohol ink and again used the front cover sheet for the mini labels {grunged up a bit with distress ink}
I used bits of a plastic skelly for some added dimension, and a selection of various idea-ology pieces to complete the look.
***
I hope you have enjoyed the projects so far, There are still more wonders to behold from both Astrid and Hels, starting with Astrid on Monday, so make sure you pop back xx
Till next time, Stay Inky

Monday, 3 September 2012

The Steampunk Locomotive by Hels

Gooooooodly Morning Snazzyfans! I don't know about you but I do love a smidge of steampunk - ok, I admit, I am totes-addicted to all things steampunkery so when I received my DT package for August (many thank-you's to Val & Don for their fab choices btw) I was chuffty-tuffty. The rest of the girlies have been busy making all their steampunk creations so if you haven't had a chance to look at them yet, please do scroll back thru the month so you can be inspired!


The first week of the month saw us offering a challenge and we all made a little something with the Chocolate Baroque stamps and goodies we had been given. I made a 6" shadowbox and whilst making that I came up with an idea for my main project. I have this old chipboard house and I was planning to add some cogs and gears to the roof and make it a bit steampunky. When I finally found the chipboard house (yep, several hours rummaging ensued before that saw the light of day again) I was dead disappointed. It was just so wrong, the height, the size, the whole thing! Funny how our memories change the way something looks isn't it? Anyways. Whilst doing said rummage, I found a mini shadowbox that is about 3 1/2" square. That set the cogs whirring (haha, steampunk reference there lol) And then the cogs whirred some more.... and gradually the little shadowbox evolved into ... The Steampunk Locomotive.


You might not know this but I do love trains - comes from driving them for 10 years I reckon. Well, this little box was being transformed into a vehicle, the cotton bobbins making perfect wheels when I had this here brainwave. The Loco needed a form of propulsion! What better than a hooge propeller on the roof? Out came mountboard and a pair of scissors and almost instantly, into the bin they went. Akkk, all wrong. They needed some dimension but also needed to be swooshy. Another rummaging sesh in the box of metal embellies unearthed 3 Idea-ology Wings.... YAY! PERFECT!!!! And of course, if you have a propeller you need a windy thing to make it start to move... so the Idea-ology Clock Key was perfectomundo for this job. Then, when I popped it onto the top of the Loco it looked more than naff! So, another rummage (you should see the state of my room now!) I unearthed more treasure in the form of really old cotton bobbins, like smidgey little ones... and after gluing the propeller to the mini bobbin that I had painted silver just worked.


Faced with decorating the inside of the box came next. I had planned to do a mini patchwork inside it... and then spied a little sqaure frame that was lounging about on my desk. I quickly whacked some black paint onto that and popped it into the middle.... perfect fit but it was a bit flat. So, another bobbin was used, gluing it to the back of the box and then to the frame... and the Idea-ology Drawer Pull is actually supposed to be a window-opener (like on a Mark 3 coach) The Chocolate Baroque stamp I used was stamped a few times and layered and then I added watch bits and three ickle watch hands.


So, that was the Loco more or less finished. But then I decided that it need a buffer on the front (purist railwaywoman remember?) I had a G45 brad so that got stuck to some Idea-ology Gears and then they were stuck to another old bobbin. And of course, a buffer on one end means a tail lamp on the other... so out came a wooden cog, an old but and an Idea-ology Bulb, painted red and aged with black paint. The wheels look ok but.. .they needed something else, so I parted with 4 Hitch Fasteners (they are now discontinued unfortunately) and a bit of Ball Chain... and voila, one Steampunk Loco ready for duty. How I wish I had more of those little shadowboxes because I want to make some coaches for it now! Anyways, if you will indulge me, imagine my little Loco, clonking along, sounding a bit like Ivor the Engine and issuing smoke and steam...


That is all from me for today... don't forget that you can get all the stashly supplies I used from Snazzy's - they have their website nearly complete... all the deets are HERE if you fancy a little peek. Thanks for looking... TTFN!


**Guess what folks, in my excitement to share my Locomotive with you, I inadvertantly wished my life away and blogged a week early!!! I know!!! I reckon that Loco got me time travelling! Anyways, Astrid is showcasing her amazing art this week and I will be back next Monday (10th) with the rest of my projects!**

Monday, 6 August 2012

Ye Olde Curiosity Shoppe by Hels

Gooooodly Morning SnazzyFans! I am here with my first project for July - using those GORGEOUS Graphic 45 papers and stamps from the Old Curiosity Shop range. Please do take a few moments to check out all the amazing art that the team has made using these products - just scroll back thru the posts to see them all... believe me, you will be missing out if you miss them. Also, HERE are the deets for the monthly competition - you could score yourself some scrummy G45 goodies too!


On with my creation: It is a blank wooden housey shaped thing that has been lurking in my stash for several decades, gathering dust and all that. Well, it just popped into my conciousness as soon as I saw the papers and stamps. I thinks to myself "I could use that wooden housey thingy that has been lurking for several decades...." I reckon that you would not actually need this shape to make something similar though - you could use a Configurations box or a Printers Tray if you fancied.


I started by painting the inside of the compartments with Traditional Tan paint (my fave paint and colour) and once this was dried, I painted the front and outsidey bits with Pitch Black Dabber - using a small brush to apply it to the smaller bits. Once this had dried I sanded it all back to reveal patches of wood and then used Gathered Twigs DI, blending it into the grain of the wood to make it look old.


Each compartments has got a base of G45 papers - they are all just so lush and the colours are so me, I was in a dither which ones to use! The harlequin is my favest so that went into the top section - I added in some snips from the papers, glued onto cardstock and shaped and then stuck to the box with a fold of card - like a prop. The butterflies were glued onto Clearly For Art and then cut out, edged with more DI and then heated (from the CFA side) and then placed inside the compartment with a smidge of hot glue to hold it in place.


The next compartment features some bottles - these are stamps from the set - stamped in Jet Black Archival onto Clearly For Art, dried, cut out and then heated and shaped. The one at the back of the compartment has a lady inside it - you need to click to see it closely though (rubbish camera skills!) The fancy glass bottle is an ancient one from my stash and the other one is a Corked Vial.


Compartment three has a flying pig - another snip of paper, glued to card, cut out, edged and then popped onto a fold of card so he can fly thru the air. The Corked Vial has another bit of paper on it - legs in a bottle... and there's a little steampunky charm and a really old vial that is also from my stash.


Compartment 4 sees a jugged butterfly - well, it is captured inside the Corked Vial... poor thing, he didn't suffer though because I popped Alcohol Ink into the bottle first so he had some nice fumes to sniff (yep, lost the plot)


The rest of the compartments were all filled in the same way and to finish, I added more butterflies to the box and a brass dragonfly. Oh and the eyeglass - this is another relic from the stash box too... it is a proper one too but could I get it to photograph properly? No!


Anyways, I shall away... As ever, thanks for looking..... TTFN!

Hels x