Showing posts with label Carta Bella All Hallow's Eve. Show all posts

Monday, 15 October 2012

Hallowe'en Part 1 From Hels

Hellllooooo and happy *nearly* Hallowe'en from me.  As you will probably be aware, the DT have been playing with those  amazing All Hallow's Eve papers from Carta Bella and those scrummy Hallowe'en Blueprint stamps from Tim Holtz for our DT kits this month.   I got myself all excited when I first saw the papers... they are L U  S H!  But when I felt them... well, I got all unnecessary because they are very finely textured and an absolute dream to work with.  The other thing that I really loves about them is that they are not orange.  I know orange is a traditional Hallowe'en colour, how refreshing to have papers that haven't got that though, brings in a whole new way of looking at things.


My first project this month is an altered papier mache H.  H is, of course, for Hallowe'en and I do love to do 3d alterable stuff so this little fella was perfect.  I chopped up some of the papers (I know, I had to be very brave for that part) and then randomly glued them all over the H.  Once the H was completely covered, I popped some Traditional Tan paint onto my craft sheet, spritzed it with water and then smooshed it all over the H with some Cut & Dry foam.  This dulls down the over all patterns without obscuring them and just gives the piece a smoother overall look.


Once that had dried, I whizzed around the edges, every so casual like, nothing needs to be perfect for this kind of altered piece, with some Pitch Black Paint Dabber.  Once this was dry I got some Ranger Glue & Seal and painted the H all over.  Glue & Seal is a brilliant product, yes it does exactly as the name would suggest, it is a fine paper glue but I use it more for sealing my paper projects.  This protects them from fading and from getting grubby but it also means that you can add spritzes and sprays without fear of it soaking into the paper too much.


Talking of spritzes... I used my ever so favourite Black Marble Dylusions spray to add some cool black spiders blood streaks and splatters... the closer you spray, the better the drips will be... and I also sort of shook the bottle at the H, the residue of the black in the nozzle will drop out to add some more splats too.


The black looked good but it needed something else... something a bit rusty looking... so I used Ancient Copper Cosmic Shimmer Spray and spritzed up close to the surface for an intense hit of rusty blingyness.   All that done I got on with the embellishing.  The bats are from the stamp set, stamped onto Grungepaper with Archival Ink, cut out and then inked with Pumice Stone and Black Soot Distress Ink.  I curled their wings a bit to make them a bit more flappy.  The spider is from a goody bag I got in the £ shop for...erm... 99p (ahem, quite)  He is a big old ugly looking thing and I positioned him so he was creeping up over the side of the H.  Using a glue gun to make a web for him was the genius idea from Gillian (credit where it is due and all that!)


The finishing touches are some clay pumpkins I made and the skelington... he is a dandy looking chap isn't he!!!    I am really chuffed with how this turned out... better than I had expected... and it is all down to those gorgeous papers, they are the basis for my ideas and inspiration.  For more info about the DT kit and how to get your hands on a set, please CLICK HERE because Snazzy's are now selling the exact same DT kits we are given...and... even better... there is a 10% discount if you order them together!  Do scroll back through the month too because all the totes-amazeballs projects that the rest of the team have made are all here for you to see too. 


And finally... if you would like to be in with a chance of winning this months random comment prize, please CLICK HERE.

Thanks for looking... I will be back later in the week with my other offerings :O))  TTFN


^0v0^ ^0v0^ ^0v0^ ^0v0^ ^0v0^ ^0v0^ ^0v0^ ^0v0^ ^0v0^ ^0v0^ ^0v0^ ^0v0^ ^0v0^

Thursday, 11 October 2012

DT Project # 2 by Astrid

Featuring Tim Holtz "Halloween Blueprint" stamps & Carta Bella "All Hallow's Eve" paper collection

Hello everyone, I'm back with my second project for this week. This time I decided to make a foldout tag holder that could be used as a Halloween gift for a special friend.


This is how I went about making it:
1. For the holder, cut a strip of Brown A4 Kraft card 12 cm wide length wise and score at 9.5 cm, and 12.5 cm along the long side.


2. Shape the shortest end piece for the flap, either with a die, a template or you could even just sketch a shape by hand.


3. Cut 3 pieces of one of the papers to 0.5 smaller than your 3 panels, sand the edges to bring out the white core of the paper and then ink them a bit. I used Dusty Concord Distress Inks. I also added a few spritzes of Ancient Copper Cosmic Shimmer mist. Glue to the outside of the holder and then add two brads for the closure. Do this before lining the inside of the holder!


4. For the inside, choose a different paper and line as before, I used the same inks and spray to alter the paper a bit. I created a pocket for the tag with a Tim Holtz Movers and Shapers die and then used one of the Tim Holtz Blue print stamps, embossed with Wow Vanilla White embossing powder. I darkened the edges a bit with some Dusty Concord and added a bit of colour with Rusty Hinge Distress Ink. I also added some bits from the sticker sheet that comes with the collection.


5. The bottom and top flaps were decorated in similar ways:


I used a white pen to add eyes to the cat and give it a bit of definition. Here you can see the whole inside:


6. The tag was made with a Manila Tag, cut a bit shorter to fit in the pocket. I Inked it with the same two inks and I also used a small chicken wire stencil to add a bit more interest. Again I embellished with stickers from the collection.


The final step was to embellish the outside with some little sprocket grears and other steampunky bits. Snazzys stock their own collection of these! The holder can be closed with some raffia wrapped wire wound around the two brads. Here you can see the tag inside the holder:


Well that's it from me for this month. Don't forget to come back on Monday when the wonderful Hels will have some amazing projects to show you!


Monday, 8 October 2012

DT Project 1 by Astrid

Featuring Stampers Anonymous Tim Holtz 
"Halloween Blueprint" stamps & Carta Bella "All Hallow's Eve" paper collection


Hello everyone and welcome to this week's projects using these wonderful products. 
If you are a regular here you will have seen all the marvelous projects my teamies have made this month already. If not, make sure to scroll down and have a look. There is even a chance of winning some awesome Halloween goodies by leaving a comment HERE.

Well, on to my first project, - I decided to make some Halloween wall art, using both the papers and the stamps.

Unfortunately I got so caught up in the process of creating it that I forgot to take photos of the early stages, so I'll just have to talk you through it.

I started with a piece of 8 x 8" chipboard from my stash. I then cut random strips of a variety of the papers and glued them onto the chipboard. The next step was that I covered it all with a thin layer of Gesso to tie it all together. I added some bits of wasi tape and some Tim, Holtz tissue tape in random places to add more interest. Next I used the stamps with Black Archival Ink. Time for a focal image, - I chose a Halloween photo from my stash, - a freebie from LandofNod studios, you can find it here if you are interested. I glued it on, covered it with a baby wipe and then sprayed various colours of Perfect Pearls Mists and some Dylusions Inks. I then added some stamping still with a chicken wire stamp from my stash.
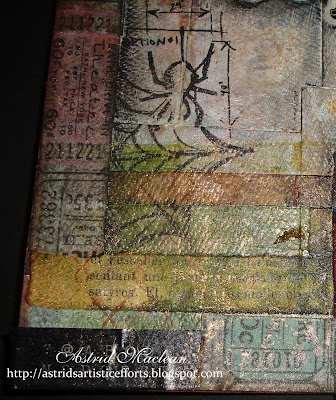
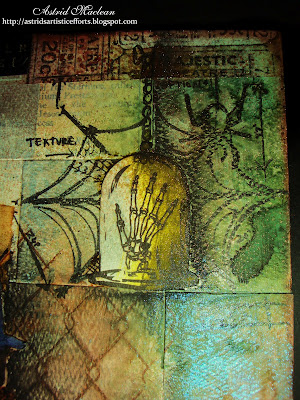
I embellished with some of the stickers that come with the paper collection and shaded around them with black charcoal pencil for extra impact. Here are some close up photos. The papers have wonderful texture that really bring out the various inks and sprays.

Here you can see the wonderful texture of the papers

One of the elements that come with the papers, I added some doodling to make it look as if it was hanging.

There are two sets of letters that come on one of the sheets, great for adding journaling. The letters at the top are wasi tape though.
Now for the final touch. I felt it needed a bit more red to pick up the red in the photo, so I decided to give the witch a rose in her mouth for a whimsical touch:o)


Well that's it for now but I'll be back on Thursday with another project. If you are ineterested, you can order the DT pack HERE


Hope you enjoyed this project and hopefully see you Thursday.