Friday, 30 November 2012

Design Team Project #3 ....

Morning Snazzy fans, today I'm back sharing my last project featuring this month's design team collection.


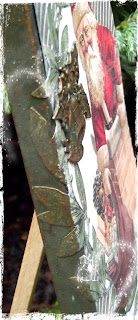
Using my faithful alterable item to go to (Paper Mache Hanging Board), I collaged various papers from the collection using Claudine Hellmuths Matte Medium.


Using the Ideaology Festive Adornments to embellish the hanging, I coloured them using Treasure Gold Wax.


Ideaology Muse Tokens (Festive) coloured as above.


I love the dimension from the papers which have been accented with Fresco Acrylic Paint & Treasure Gold Wax (Spanish Topaz).


A little smidging of Rock Candy Distress Crackle Paint on the number 24.


The back has been decorated using the Hero Arts Clear stamp set (Believe) which has been inked with Archival Ink (Library Green).

Lesley will be here on Monday sharing her projects with you, until then if you want to be in with a chance of winning this collection click HERE and leave a comment.

Thanks so much for all your lovely comments ... until next time .... stay inky! x

Wednesday, 28 November 2012

Design Team Project #2 ....

Did you see our news!!!!!!!! .... oh my I'm still giddy with the excitement. To see all the details and how to register your interest, click HERE.

So today I'm back sharing an easy peezy project using the beautiful 12x12 papers & embellishment sheets. A quick and easy way of journalling your christmas day memories either to keep for yourself or to share with a loved one.


Simply cut your preferred cardstock cover to size, score down the middle, ink edges with Distress Ink (Walnut Stain), then cut various size pages from remaining cardstock and embellish with tags/stickers from the collection. It really is as easy as that!

(inside front)

(2nd page)

(3rd page)

(4th page to which I have added a kraft gift label for extra journalling/notes)

(the journal has simply been bound with gold metallic thread)

(back cover)

If you are like me *a real paper hoarder* this is a quick and easy project to use up your cardstock, it doesn't just have to be for christmas.

I will be back on Friday to share one more project with you, until then thanks for stopping by and leaving a comment. x


Monday, 26 November 2012

Guess Who's Coming To Town ....

Noooooo it isn't Santa lol (but he is rumoured to be making an appearance on the eve of the 24th Dec or so they say, time to be confirmed depending on where you are in the world)!

 Hello again Snazzy followers, the wait is finally over ....

Forgive me if I go off on one during this post but I have THE MOST EXCITING NEWS TO SHARE WITH YOU ALL. After months of negotiations I can finally reveal that Snazzy's have secured the U.K debut visit from THE one & only Anna Dabrowska aka Finnabair *oh my giddy aunt* exciting or what!


For those of you who do not know Anna or her work .... Anna is a Mixed Media Artist, Scrapbooker, Art Journaler and teacher. Anna is also one of the designers for 7Dots studio and has created the most amazing paper collections such as Dreamer, Wonderland & Domestic Goddess
Anna currently also design for Prima & Sizzix UK

Anna has the most unique and distinctive style I have ever seen, her eye for composition is just amazing so whether you want to have a dabble at Mixed Media Collage, a Scrapbook Layout, or a journal spread, Anna has something for everyone. Inks and sprays will never be seen in the same light again!

I was fortunate enough along with my other teamie Astrid to take workshops with Anna earlier this year .... all I can say is WOW .... you have to see this lady irl teaching her tricks (truly inspiring). Anna's passion for what she does touches everyone taking her classes. Anna is also a truly lovely lady:)

Soooooooooo .... the workshops will be held HERE on Saturday 31st August & Sunday 1st September 2013. There will be two workshops per day, each class will hold 24 people. You will have the option to book the classes individually or all four together. The workshop class contents are still to be confirmed as Anna is working on new stuff which will be revealed after CHA in January:):):) We will then share the full details with you as soon as possible.

To register your interest in the workshops e-mail Val at snazzy@snazzysstudio.co.uk with subject header: Anna Dabrowska Workshops

Phew all that excitement .... I need a large G&T lol!

DT Project #1 (Santa Claus Is Coming) - A Winner & NEWS ....

Good morning everyone, wow where did those last few weeks go! Thanks to all the DT for some amazing projects over the last few weeks .... I'm sure you will agree!

With 36 comments going into the pot, the lucky winner of this months prize chosen by Random.Org is ....


 ...... #2 Redanne. Congratulations please e-mail Snazzy's with your details (Subject Winner).

Okay onto business lol ..... this month the design team are working with this kit 


featuring the Carta Bella (Christmas Day Collection), Hero Arts Clear Stamps (Believe) & Ideaology Festive Muse Tokens .... to be in with a chance of winning this kit, simply leave a comment HERE.

My first project is using a blank Artemio 15x15cm Shadow Box which has been painted with Eco - Friendly Acrylic Paint (Pomegranate).


I've applied Fresco Acrylic Paint (Holly) to a texture sponge and randomly sponged over the front of the frame.


A little touch of sparkle courtsey of Rock Candy Dry Glitter & some Ranger Glue n Seal along with a Ideaology Curio Knob


For the centre of the box I cut a piece of cardstock from the collection (Down The Chimney) to size adhered with Cosmic Shimmer Glue. I then used a mini canvas to add dimension to the next layer of cardstock (Christmas Day/Christmas Cards) which was then coverd with the new Ideaology Frosted Film (love love love this stuff).


The strip along the bottom with Santa Claus is coming to town is from the Christmas Day/Holiday Borders cardstock. I will be back later in the week with another project to show you .... until then stay inky!!

Did I forget something *scratches head* ..... ahhhhh YES THE NEWS .... *am sooooooooo excited an I just can't hide it* lol, you will need to stop by the design team blog at 5pm when I will reveal all ..... honest it's an absolute belter!!!!!!!

until then :):):):):)


Friday, 23 November 2012

The Rosey Tag of Christmas

Gooooodly Morning Snazzyfans... cor blimey, my internet is soooo slow, I have just spent a yonk and a half trying to get my page to load.. finally!  Well, I shall be a smidge later posting this than anticipated but better late than never!  So, I am back again with another offering that I made using the (saying this loudly) Teresa Collins Christmas Cottage Collection papers that we DT have been lucky enough to be playing with this week.  How can I describe the papers?  Do you remember the old Crate Papers of years ago? Textured so they have a linen-y/canvassy feel to them? Well, these are just like that, very reminiscent of them. The designs are marvellous - not too old fashioned but with enough of a vintage feel that they aren't ultra modern and in-your-face (I don't do ultra modern lol) The quality is amazing; they are a very strong paper, more like a cardstock in actual fact.  The Collection comes with a sheet of die-cuts too, one of them I have used on this tag - and they all match perfectly with the double sided designs.  And... did you know... you can CLICK HERE to be transported off to the Snazzy Online Store where lovely Val and Don have put a discounted special offer on our DT kits for this month.  As well as the papers we have had some stamps to use (I haven't inked mine yet!) and... some goooorgeous brads to match too (I loves my brads!)  Anyways, enough waffle, on with the tag:


The tag is a Size 8 cut from plain cardstock and then covered with two of the patterned papers.  I made a little border thingy to cover up the join in the papers and added a brad from the pack - check it out... not only is it big (bout the size of a 5p) it is also designed and has an epoxy covering so it is glossy and raised!  Cool huh! Once I had done this, I edged all around the tag with Frayed Burlap Distress Ink and then took my paper distresser and scuffed up the edges to make it a little shabbier. 


Next came some bling in the form of a very light wafting of Rock Candy Dry Stickles - I used Glue & Seal to paint onto the top and bottom of the tag and then sprinkled liberally with the Dry Stickles... I LOVE this stuff.. it is like crushed sugar, not a smidge of AB anywhere so the light just sparkles instead of colouring.  You can see the bling in one of the photo's.   I did a wee bit of die-cutting with the papers - you can see how strong they are, they withstood a Vagabond-ing and then a sanding too!  I added Rock Candy Dry Stickles to the number 25 - again using Glue & Seal for the sticky bit.


After all that die-cutting I got all creative (!) and made myself a rose.  I love making these big fancy roses - they are soooo simples too - if you check out my own bloggy there's a link in the side bar to a Tut I did some time ago... a simple way to make pretty roses.   I added some wire twists and a couple of Alcohol Inked bells to the rose embellishment and then finally, one of the pop-outs from the die-cut page of the collection, edged with Frayed Burlap and distressed with the paper distresser and then popped into a Memo Pin.  I added a few bits of Idea-ology to the top of the tag with some ribbon and voila, finished!


If you haven't already... CHECK THIS OUT... you can leave a comment and be in with a chance of winning some fabby candy... all you need to do is leave a comment!    That's all from me for now... thanks for looking... have a great day!  TTFN


Monday, 19 November 2012

The Christmas Gift-Velope By Hels

Gooooodly Morning Snazzyfans... blimey, I don't know about you but November has whizzed past and my thoughts are now turning to Christmas and pressie-time.  I am sometimes a bit useless at buying gifts for loved ones so I tend to get a nice gift card or voucher... and usually they come with cards from the store, which are invariably all a bit samey.  So, I hit on the idea of making a little Gift-Velope so I can pop cash or a voucher or a gift card into it, the recipient will then have a little keepsake that they can keep or display over Christmas.  To make it is simples and using the new Teresa Collins Christmas Cottage papers makes it even more simples because this paper is actually a really decent thickness, tis more like a cardstock, so it is sturdy enough to score and fold and stands up to being handled.  Add to that the lush designs, well, like I said, simples!  Here are the measurements if you fancy making some yourself:


Cut a piece of paper to measure 26cm x 13cm.  Along the long edge score in from the left at 8.5cm and 9.5cm.  This will make your first foldy bit.  Then score and fold again at 19cm and 20cm.  This is your second foldy bit (do you like the technical terms I am using? lol)  Then use a bone folder or similar and fold your scored lines and press a nice crease into the paper.  Snip the left hand flap at angles of 45degrees so you have a tag top shape (as shown)   Cover the inside with co-ordinating papers, this not only makes it prettier, it also adds some more dimension to the design.


For the pouch, cut a piece of paper to measure 9.5cm in height and 26cm in length.  Score and fold the paper so it has an over-flap of 1.5cm at one end, this will then fold over to secure the pouch together.  Finally, stick the bottom of the flap together and glue to the inside fold as shown.  For the closure I used a couple of punched 1/2" circles that I popped a couple of the co-ordinating Teresa Collins brads through and used Paper String to fasten the flaps together.  All of the cut edges of my papers were blended with Frayed Burlap Distress Ink just to tone them in and add a smidge of vintageness to the design.


I added a couple of Alterations Snowflakes, also cut from the gorgeous papers and then popped a couple of little bells on for a bit of decoration.  I also diecut the 25, coated it with Glue & Seal and then sprinkled Rock Candy Dry Stickles over to add some blingyliciousness to the design.   I hope that you do make some of these, please do let me know - they are a doddle to make but if you have any probs, just bob me an email over and I will try to explain better!   As ever, these delicious goodies are available from Snazzy's... check out their website for lots of new stashly goodies added regularly.  Oh and don't forget, Snazzy's are offering this months' Design Team kits for a discounted price... seriously GREAT value cos there are stamps in the kit too which I haven't used yet!!  Please do scroll back over the previous posts to see the gorgeous creations my teamies have also been making... they are all using the same products... but all so different so lots of inspirations for you all.    Oh and before I go... if you CLICK HERE you can leave a comment and be in with a chance of winning the DT kit we have been working with (obvs a new one, not the ones we have chopped up!)    Thanks for looking!

TTFN


Thursday, 15 November 2012

DT Project #2 showcasing Christmas Cottage Collection by Theresa Collins Posted by Astrid


Hello everyone and welcome to another project showcasing this wonderful Christmas collection. If this is your first time here, make sure to scroll down to see all the great projects posted already. You could even be in with a chance to win the collection, all you need to do is leave a comment on the first project here

For my second project I decided to make a folder to hold favourite Christmas photos
I started with a piece of A 4 Kraft card and cut it at 6". I then scored 5 1/2" from each side which left me with a spine that ensured space for some embellishments and pockets to hold photo mats on the inside:


I lined both the front and the back first with a square of vanilla card stock then with one of the papers and then embellished it with a strip of lace, a strip of the paper, edged with a Martha Stewart punch, a die cut cut from Kraft card and some elements from the paper collection and a piece of ribbon from my stash, as shown on the photo.


I lined the inside again with vanilla card stock and then made pockets as shown from the papers. The Tim Holtz  Tattered Doily on the left pocket was cut from one of the papers, as was the strip on the right side. Most of the other bits are elements from the collection.
Here are a couple of close up photos:


Next I cut some double photo mats from vanilla card stock to fit inside the pockets. I lined just the front of them with further pieces of the papers for photo mats and left the inside blank, either for further photos or journalling. Here you can see the photo mats inside the pockets.


I added some Vintage Photo Distress ink  around the edges to give it some definition and that was it. Quick , easy and a fun way to keep some favourite Christmas photos in a handy place together.

Well, that's it from me for this time, but don't forget to come back on Monday when Hels will start to share her projects for the final week of showcasing these beautiful papers and stamps.


Monday, 12 November 2012

DT project #1 featuring Teresa Collins’s Christmas Cottage Collection by Astrid


Hello everyone and welcome to the Snazzys blog. Regulars will know that this month we are featuring the wonderful Christmas Cottage collection by Teresa Collins. Like usual you have a chance to win this collection, all you have to do is leave a comment on the first post here Make sure to also check out all the other fabulous projects my teamies have been creating so far!


Every once in a while I enjoy doing a good old paper crafting project, so away goes the gesso, brushes and paints and all the arty cool stuff, and out come the scissors, ruler and glue. The moment I saw these wonderful papers they spelled Christmas Gifts to me, and just such  good old crafty fun, these lovely traditional look papers just lend themselves to that perfectly.
Now the project on the right is not a card as you may think but a little tea light gift box. Here you can see the inside:


I’ll do a quick little step by step for you, just in case you want to make one yourself:
What you will need:
Papers from the collection
3 sheets of strong A4 Card
2 tea lights
A match box (I used a Swan one which is just the perfect size).
1. Take one piece of card and cut at 5” along the long side.
2. Score at 5”, 6” and 11”, the remaining bit becomes  a glue tab.


3. Do the same with a second piece of A4 card and glue together as shown. The second square will over lap, this gives the base of your box strength.


4. Make the inside box for the lights and matches by cutting a 5” square out of your third piece of card, and score at 3/4” round all for sides, cut slits as shown for the glue tabs. and fold and glue together.


5 Now comes the fun part of covering everything with bits of your chosen papers from the collection. I made mine just 1/4 “ smaller than each of the panels Glue the little box onto the base of the inside of the outer box and apart from embellishing you are done!


Here you can see how I covered the match box:


And here is some more detail on the front of the box:


I used various Tim Holtz and Spellbinder dies from my stash to embellish my box as well as some of the lovely brads and die cuts that come with collection. I also used the stamps from the collection for all the sentiments. I adhered some small magnets on the inside of the cover and underneath the flap to hold the box closed.

Alright, now for the little house, – this is actually not just a deco piece but can also be a little gift box as the roof comes off  to hold some special Christmas baking.


I have created a template for this. The easiest way to make the house is to cut one of the papers to A4 size and print the template straight on to it. Alternatively you can print on to a bit of card and then use that as a template for the house by tracing it onto the card stock from the collection.

Once cut, folded and glued together you can again decorate it to your hearts content. Here are some pictures of how I did mine.


Well I hope you enjoyed this little project and maybe you feel inspired to make some gifts like this your self. The quality of these papers is superb and strong enough to make these boxes sturdy!


I’ll be back later on in the week with another project, so until then, stay crafty!